
While Adobe Photoshop, GIMP, MaxIm DL, Nebulosity, and various other individual tools can be used to processes astronomical images there is nothing quite as comprehensive as Pleiades Astrophoto’s PixInsight software.
PixInsight can be used to both pre-process and post-process photos for top-notch final results. While not exactly inexpensive, a PixInsight license does cost less than a Photoshop license, but is targeted toward astrophotography and packed with helpful functions to help you get the most out of your acquisition data. At this writing, PixInsight costs a few hundred US dollars, which I consider a great value when considering the pixel magic it is capable of.
The software does offer a 45-day free trial for those wishing to give a whirl, but don’t be dissuaded by it’s complexity up front. With a little practice the basics are easy to master and you’ll be tuning out great looking images in no time. Like any capable & powerful tool, the nuances and features can take years to fully understand. I have been using PixInsight for nearly five years, and still feel as if there is much to learn! But what aspect of this hobby doesn’t involve a bunch of learning? It’s part of the adventure!
Upon first launching PixInsight, you’ll be presented with an interface which contains features and methods to accomplish tasks quite unlike most other software. This tutorial hopes to serve as a primer for those trying out PixInsight for the first time, hopefully saving you some time and frustration during your initial exploration. I would suggest downloading a copy and following along with some of your own images to help cement the concepts via practice. In the future more tutorials regarding specific features and techniques of PixInsight will be added to Valley Astro, so check back often.
Note: Unfortunately my screen capture software interferes with some of PixInsight’s drag-and-drop features. While some of the animated images below show appropriate drag operations, they often do not reveal what happens when including the “drop”. I apologize!
Table of contents
Interface Basics
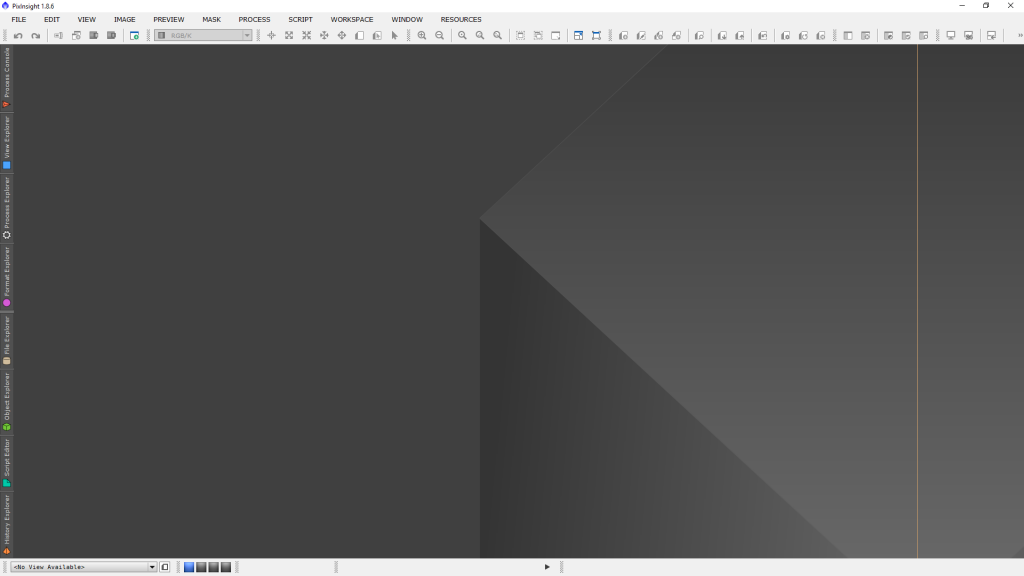
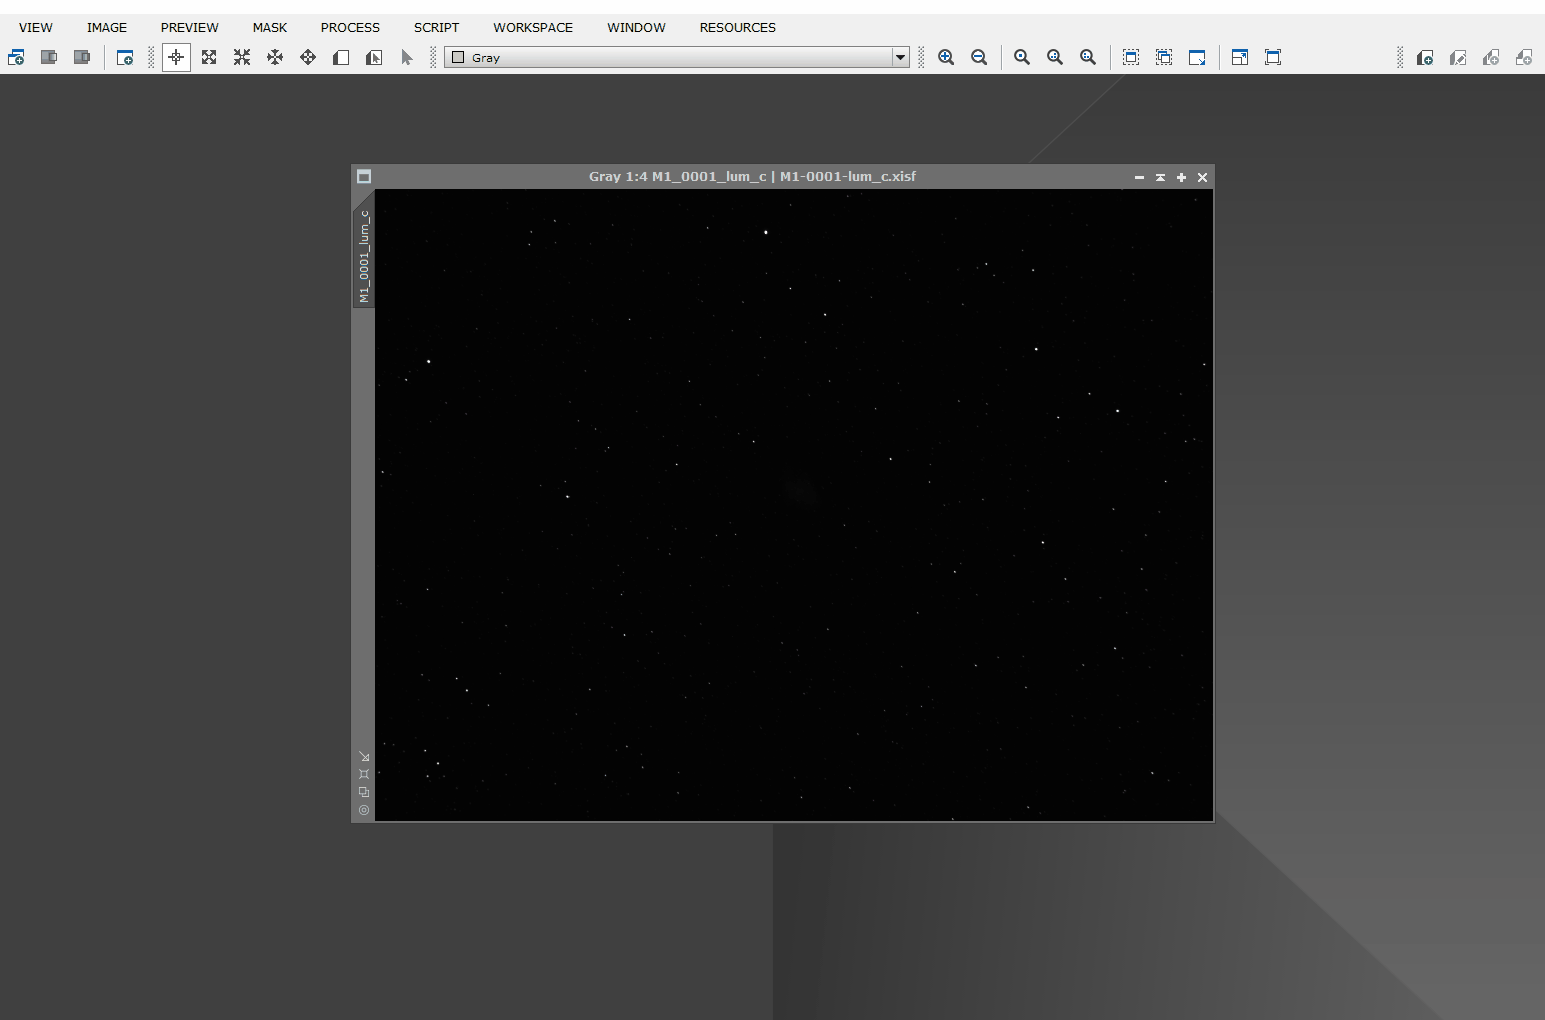
Upon launching PixInsight for the first time, you’ll be greeted by the default workspace window. The PixInsight application itself functions much as a desktop-within-Windows Desktop, in such the large gray area is used to store working copies of images, processes, and scripts.
Along the left tool bar are what I like to call toolbox drawers. By clicking these tabs, options and information will be presented to you, sliding out from the left. In this example I’ve clicked the Process Explorer tab to reveal the wide variety of built-in PixInsight processing functions available to you. The other tabs provide other useful features, which we’ll cover later in this tutorial at a high level.

After selecting an option from the slide-out drawer, typically the drawer will slide back out of the way to it’s starting place. If you wish to keep the drawer exposed, there are window control options available control its behavior. Hovering over each button provides a hint as to its function.
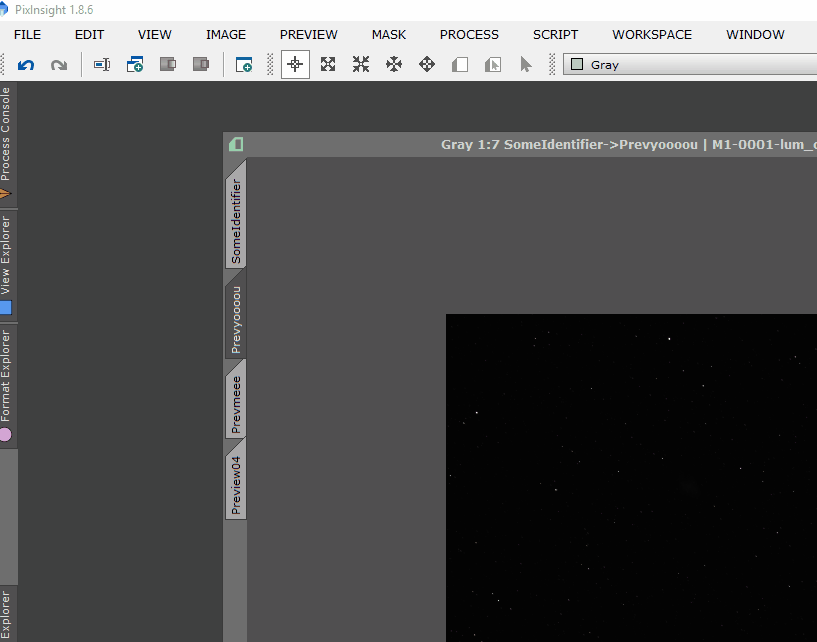
Along the bottom tool bar, you’ll find the view & workspace selectors. Once you begin working with images and working variants, the drop down will populate, listing the windows identified in your workspace. The small rectangular icon to the right toggles whether or not Previews will appear in this list. We will cover the functionality of Previews in detail in a later tutorial, but for now know they are a method to observe changes to a specific portion of an image temporarily. The workspace buttons the right of the Preview toggle offer four independent desktops within PixInsight that you may switch between. Workspaces are handy if you find yourself working on more than one image data set simultaneously, or perhaps to try different variants of the same data set and grouping them together to stay organized.
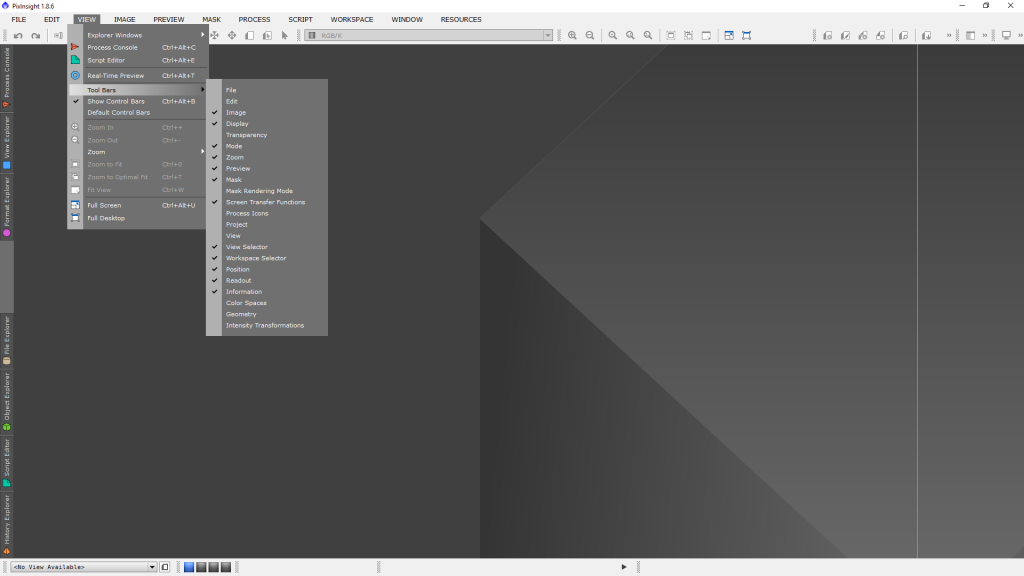
The menu toolbar and ribbon at the top functions like most other Windows software. However, there is one notable feature. By grabbing the individual ribbon panes by the textured area, you my rearrange and/or resize them as you please.

If you’d prefer to disable a ribbon toolbar completely, this is possible via the typical Windows menu method of “View” > “Tool Bars”
Like some other Windows software, PixInsight handles child windows within it’s own desktop. As you delve further into PixInsight’s features, you’ll notice this is very helpful for storing and saving multiple copies of an image as your workflow proceeds. While minimized, the window icons will “snap” into place to help you keep your desktop organized.
PixInsight utilizes a very unique method for applying settings on dialog boxes, images, etc. Rather than the typical “OK” and “Cancel” buttons on windows, most windows that allow adjustment of settings or data will have a square or circle-shaped “Apply Global” or squared-shaped “Apply” button along the bottom-left of the window frame. In the case of the circular “Apply Global” button, clicking the icon button applies the current settings displayed in the dialog box to the entire PixInsight environment. Conversely, a square “Apply” button usually only applies the settings to an indvidiual window. Either way, this is analogous to “OK” in most programs. Whether you see one or the other, circle or square, depends on the context of the window.

To the left of the Apply icon is the triangular “Apply” variant. You may notice icon is not a clickable button. Rather, it is an interesting way PixInsight allows application of of current settings to a single window, or alternatively save a set of settings for later use. To apply settings to a single window, simply drag the triangle icon on to a window. Note in our example, below, the normal “Apply” button is the square, which we could have used to similar effect.
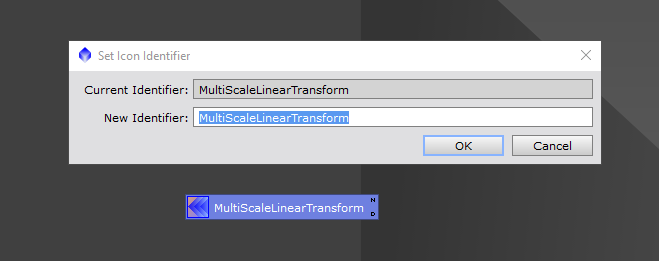
This triangular Apply button may also be used to store settings for later use. To do so, simply drag the triangle icon to the desktop. PixInsight will create an icon containing the settings for the associated process or script. It may be accessed again by simply double clicking the resulting icon. The icon itself may be renamed and contain a description by clicking the small “N” or “D” on the right side, which often proves helpful of tracking different experimentation efforts during your workflow.
Working on a data set in PixInsight often takes hours as you explore and fine tune processes to hone your image. Naturally, doing this all in one session is unreasonable. As such, PixInsight offers a method to save the entire work environment in one go, holistically saving temporary images, workspaces, and processes you may be using, and any other data you’re tinkering with. To do this, use “File” > “Save Project”. Note this is different that saving an individual image; by saving the project, PixInsight will automatically save any image work in progress for you, so can take a break assured nothing was forgotten. Projects span the entirety of PixInsight, and effects every image window and workspace that may be in use.
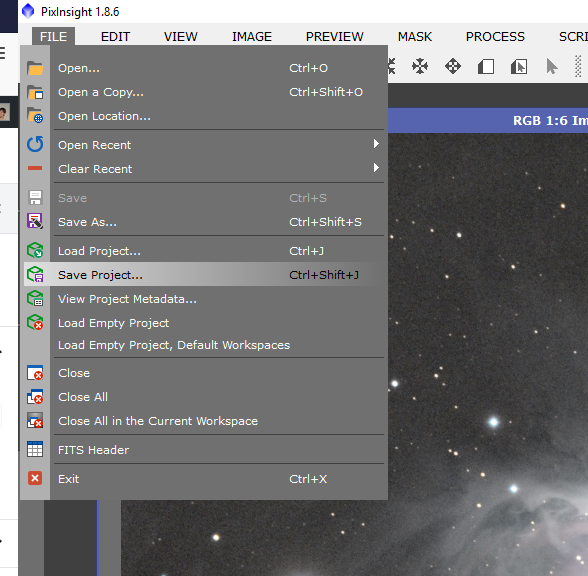
When re-launching PixInsight, simply use the “Load Project” option on the same menu to pick up right where you left off. Now that you know your basic way around the PixInsight environment, let’s dive deeper into some specifics.
Settings
PixInsight’s settings dialog is available via the “Edit” > “Global Preferences” menu option. I’ve found that the default settings work very well, and personally have not had much reason to change many them. However as you’re exploring the software it is worth the time to familiarize yourself with what is available.

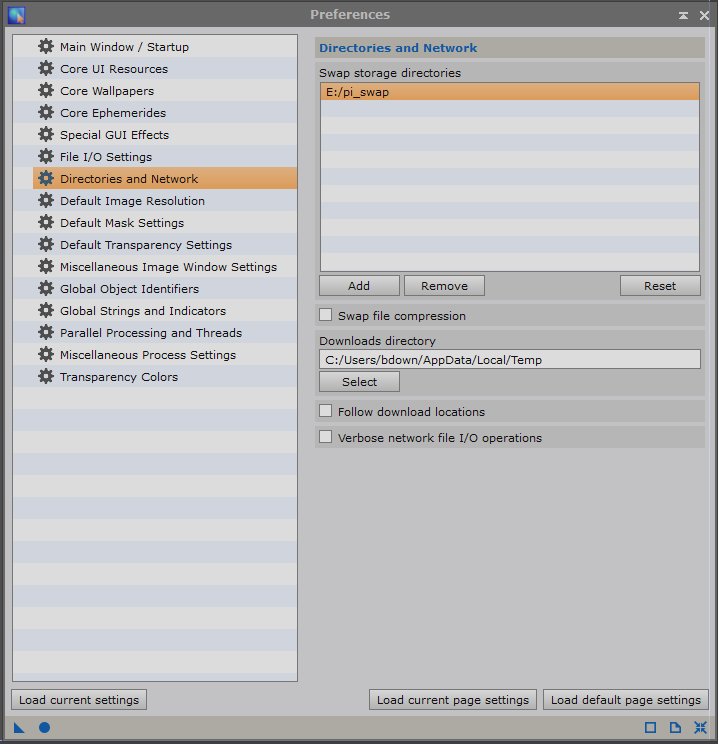
One setting to note is the “Swap storage directories” setting under the “Directories and Network” category. This instructs PixInsight where to store temporary files it creates during processes needing scratch disk space, like image manipulation or software maintenance downloads. In my case, the C: drive on my PC is an SSD not very large. The PC has a dedicated hard disk drive for astronomical imaging data. If your PC is of a similar configuration, you may wish to modify the swap and storage location to a disk with more free space, as I have here.
Color Calibration
Since we are working with image data, you may find the color management settings particularly useful. These are available under the “Edit” > “Color Management Setup” menu option. Diving in to the concept of color profiles is out of scope of this tutorial, however these settings quickly allow you to calibrate your PixInsight images for screen or print settings. These settings are used to instruct web browsers and other software on how to correctly interpret the color data your image contains. Normally you’ll want to keep the standard color profile of sRGB IEC61966-2.1, as this is the standard calibration profile used on the Internet. However, Adobe RGB is another popular option.
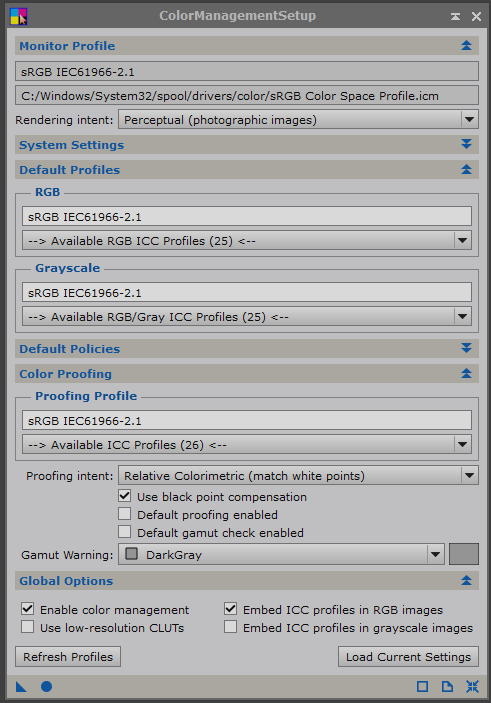
Image Windows and Previews
PixInsight will work with many standard image types, including the FITS format common in the astronomical field. However, PixInsight now defaults to a new XISF format developed by Pleiades Astrophoto. This new format is an open standard, and I would expect it to be implemented in other software in the future. The entire image processing workflow may be performed using the typical FITS format , however I’ve modified my processes to utilize PixInsight’s preferred XISF format until the image is ready for publication. At that time, I’ll generally save a final finished copy of the image in XISF, FITS, and PNG or JPG for display on the website or sharing elsewhere. Being PixInsight is now defaulting to XISF, it is sensible to keep image data stored in that preferred format until needing another.
To open an image, in any supported format, use the “File” -> “Open” menu option common to many other software.
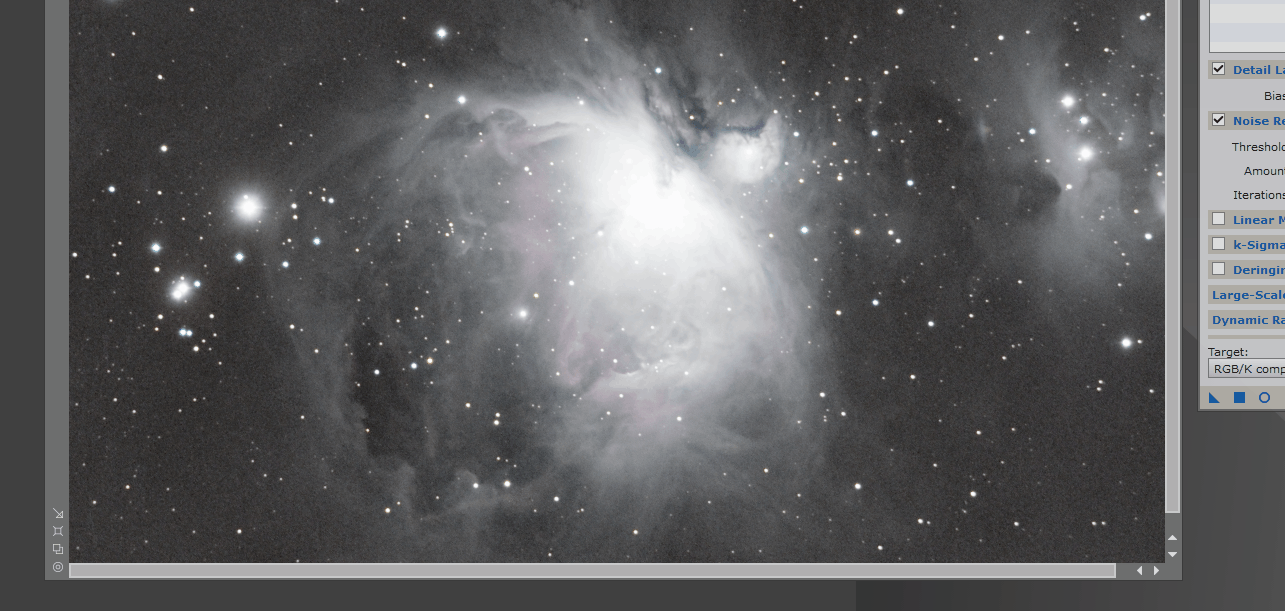
Upon loading the file, the image’s child window will appear on PixInsight’s desktop, displayed linearly. If you’re completely new to astronomical imaging, linear images are visual representation of raw data, with no consideration as to how it may appear to the eye. Typically these are very dark with not much visible detail. Usually, to work on the image, the raw data is “screen stretched”, meaning the wide range of high and low data points and light and dark levels are manipulated into a range suitable for viewing on screen. We’ll cover linear images and stretching in more detail in a later tutorial, for now it’s sufficient to simply know the meaning behind the terminology.
It’s a good idea to become well acquainted with the management components of image windows, as there is quite a bit going on and you’ll be using them extensively.
First, let’s cover the standard window manipulation controls. At the upper right, in order of left to right, are the “Iconize”, “Shade”, “Maximize” and “Close”. You are probably already familiar with Maximize and Close, so we’ll skip those. However Shade and Iconize are atypical. The Iconize option effectively closes the window and stores it as an icon on the workspace desktop, yet the image data remains in working memory of your PC. Alternatively, shade rolls up the window so it is simply a title bar. Both methods allow restoring of the window to its previous state by double-clicking the icon or shaded titlebar. I find the the iconize method useful when needing to get a particular image completely out of the way for bit, while shading it is a quick way to temporarily hide to view other work.
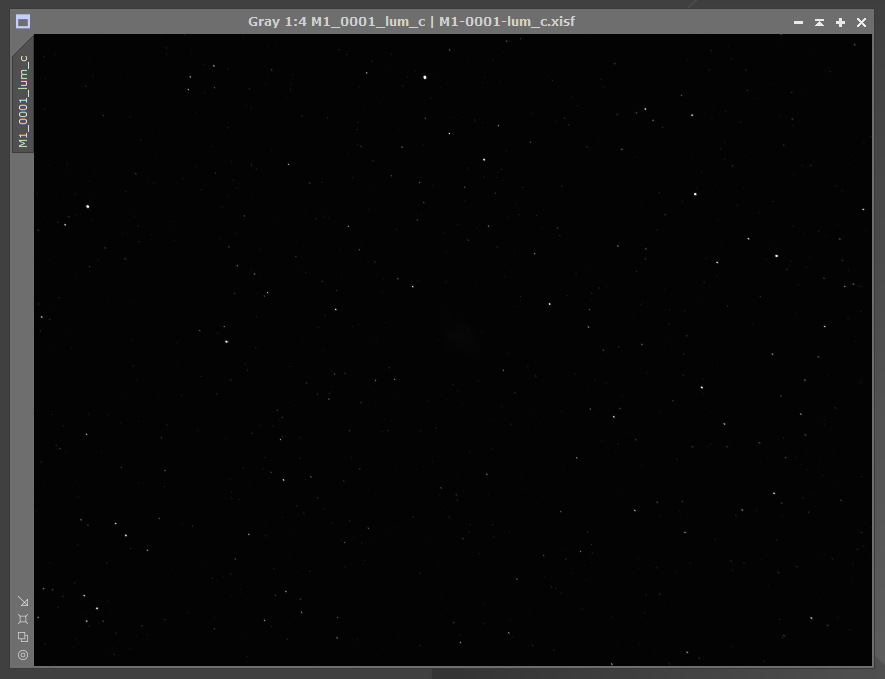
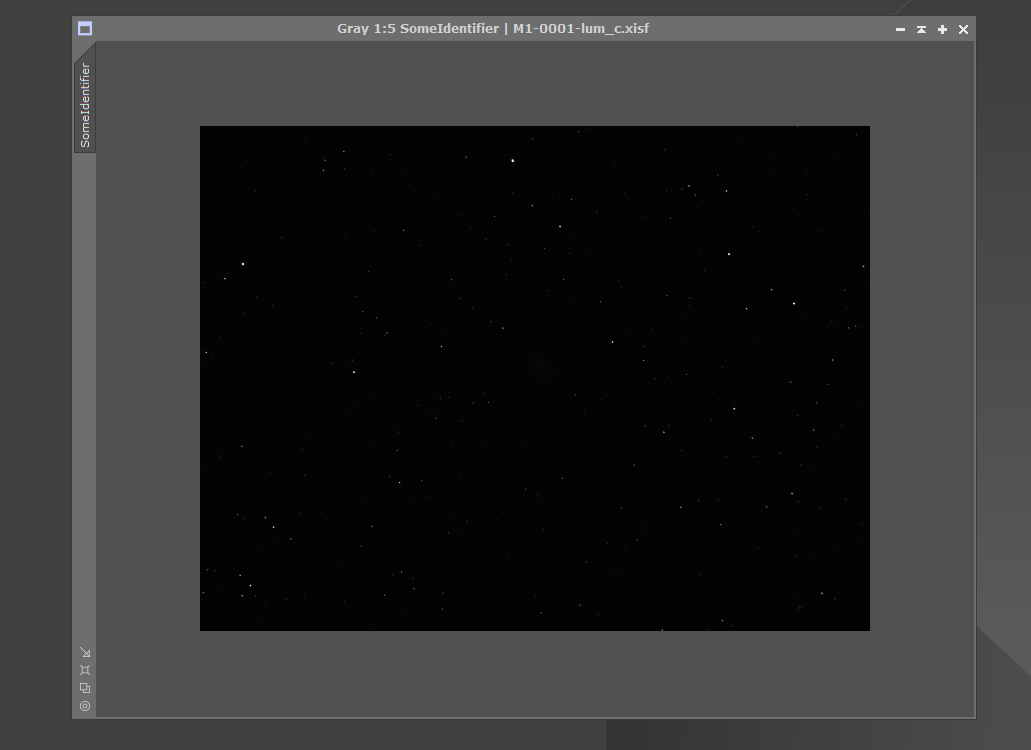
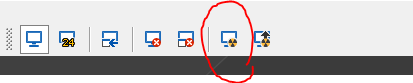
Moving to the center of the title bar, basic information regarding the image is displayed. Here from left-to-right, it describes the current color channel the image belongs to, such as combined RGB, individual color channels like red, blue, or green and perhaps gray in monochrome images. Next, the current zoom level is provided in pixel ratio format (X:X). Finally, the “working” identifier (by default the same as the file name) and the actual filename of the image are provided, those two being separated by a pipe (|) character.
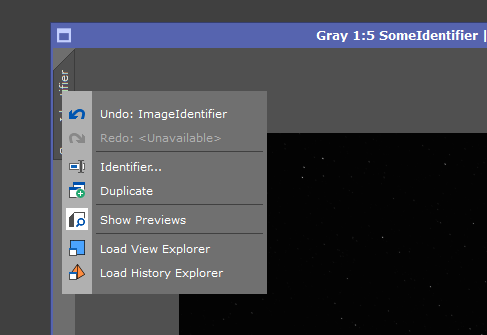
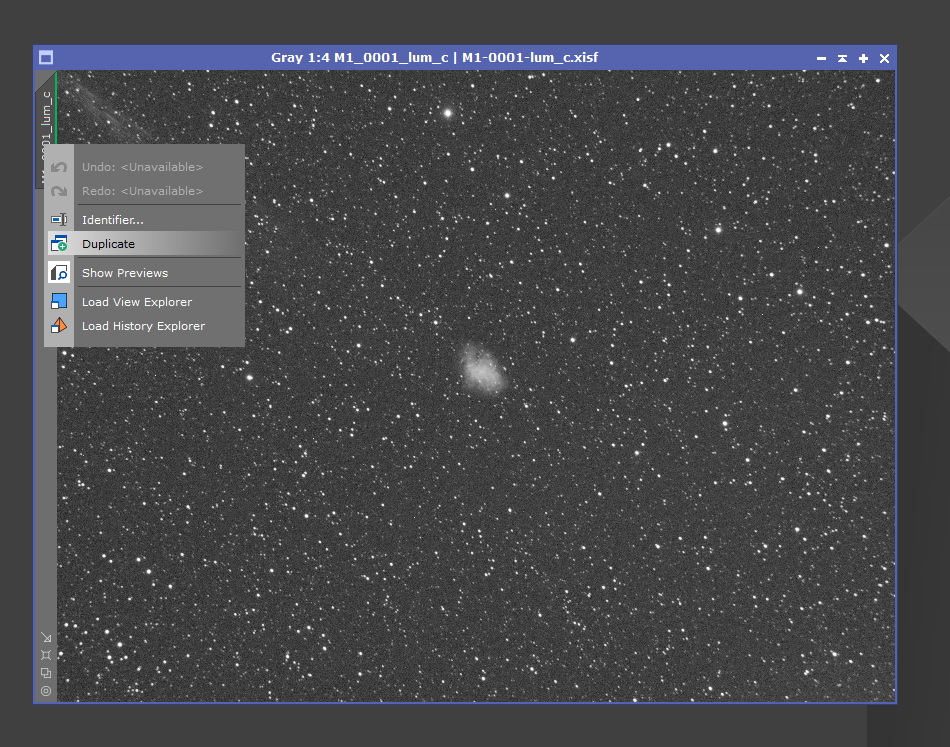
The “working” identifier feature functions similar the desktop icon renaming we covered above. It provides a method to describe and track changes to your images as you proceed through the workflow by naming them as you please, without needing to save individual files out. When renamed, the window title bar changes accordingly. To change the working identifier simply right click on the main image tab and select Identifier. Note that PixInsight is rather picky regarding naming conventions. No spaces or special characters are allowed.
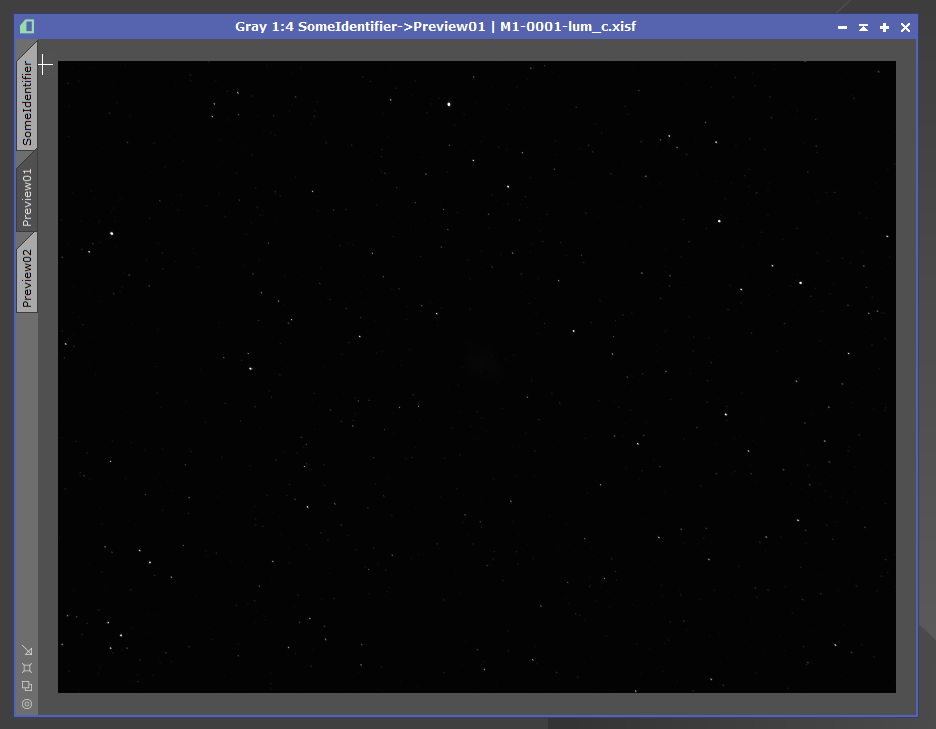
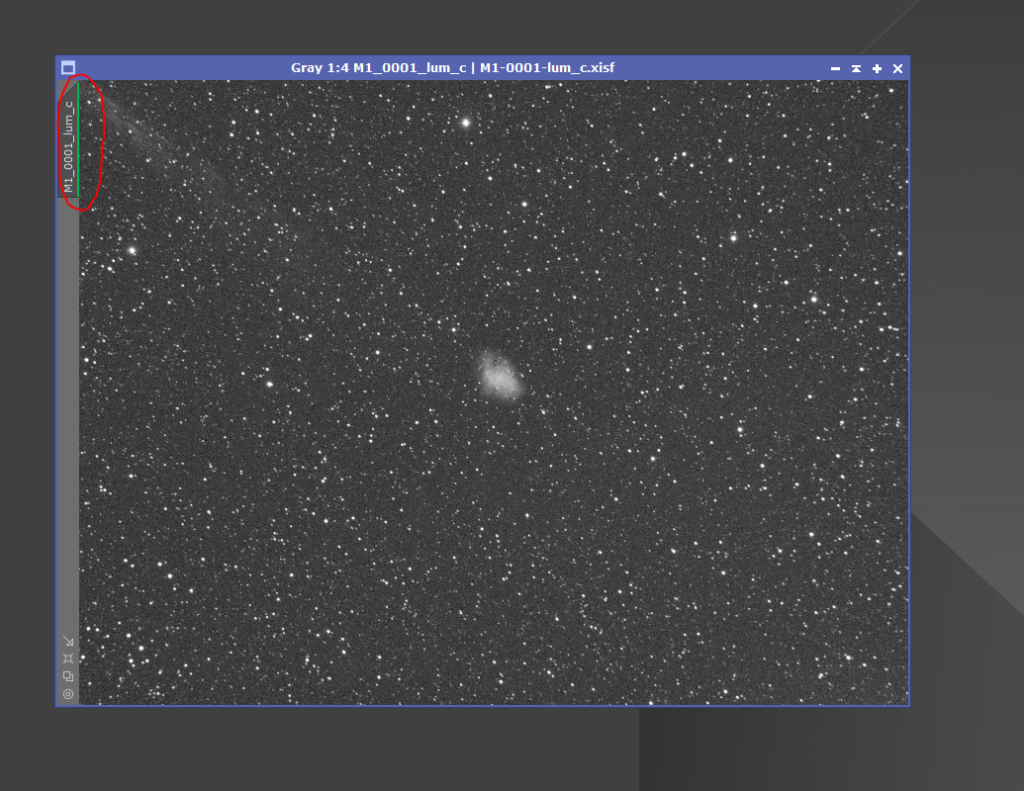
Next, the image window’s left side contains a feature called the View Tray. This allows you to create multiple views of the same image file, which PixInsight simply calls “Previews”. Previews are very useful in trying out different processes on the same image and switching between them without making those changes permanent. Previews act as temporary snapshots of the same image data, without a need to save out multiple copies of the file. You may use a Preview to test how a script or process will act upon only a small portion of an image, and when satisfied, apply it to the whole data set if desired.
To create a new Preview, simply drag the main, or primary view tab to an empty portion of the tray. You may do this multiple times to open up many previews at once.
After creating the Preview tab in the tray, you can then select between the main view and Previews by clicking on the appropriate tab. When doing so, the named portion of the window title bar changes to represent the preview, kindly reminding you which view of the image you’re working with. The tabs to the left are also highlighted appropriately to help you keep track of what’s being displayed.
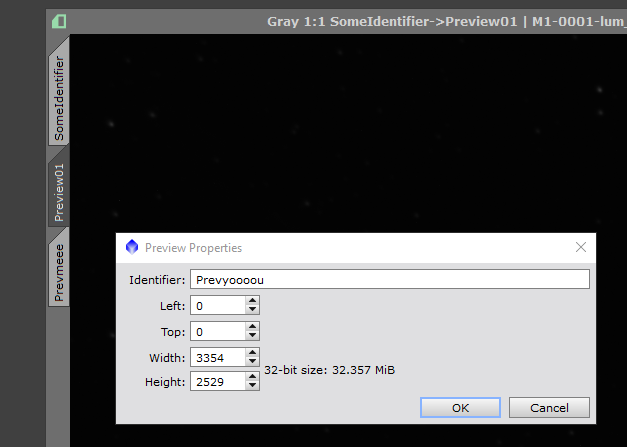
The Preview tabs can be renamed, like the main image tab, by right-clicking them and selecting “Modify Preview”. However these tabs also allow further manipulation than the main image tab, allowing resizing so they represent only part of the entire image. Also, this right-click context menu on each Preview tab may be used to delete a Preview, clone it as a new Preview, or even convert the selected Preview into a brand new image itself.
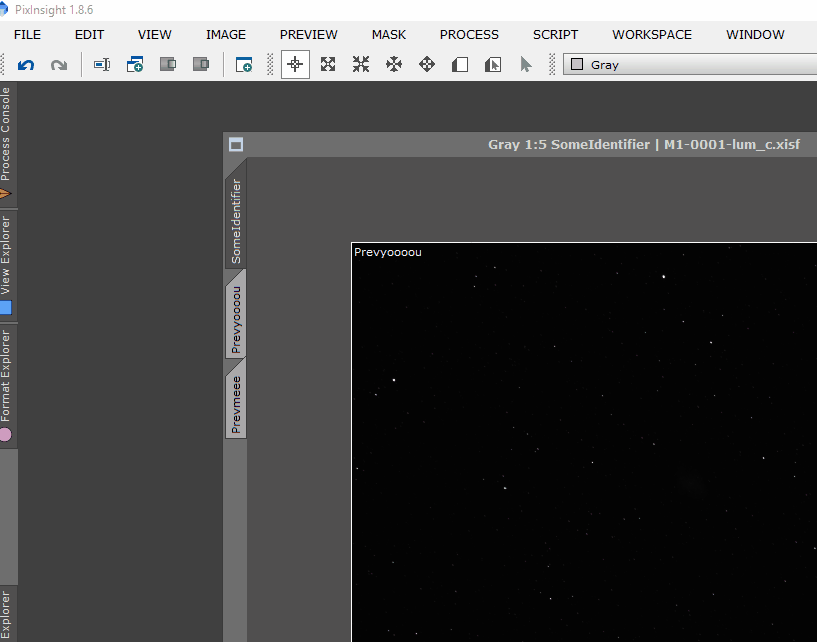
However there is a much faster way to create custom-sized previews. Instead of dragging the main image tab into the View tray to create a preview and then modifying it’s size via the right-click context menu, use the “New Preview Mode” button on the Mode ribbon toolbar. Note for this icon to be clickable, the main image tab must be selected. It isn’t possible to create a Preview of an existing Preview!
Similarly, you can edit existing Previews if you’re not happy with their size, shape, or position. Do so by clicking the “Edit Preview” button, located right next to the previous “New Preview” button. Again, the main view tab must be selected first.
View tabs use color tagging to represent changes in what is being shown versus what the image was opened as. Using our same example M1-0001-lum file, we can apply a quick screen-stretch by using the the “STF Autostretch” button on the tool bar. The displayed image suddenly shows what data has been lurking. You can also apply a quick STF Autotstretch by using the keyboard shortcut Control-A.
Note we haven’t permanently changed the image’s data set. It is only displayed in stretched form on the screen; the linear data is still saved on disk and in memory buffers for other processing. We can tell this view has been temporarily screen auto-stretched by the green highlight that appears on the tab.
Moving to the bottom right of the window, several image & window display size shortcuts available. From top to bottom these are “Fit View”, “Zoom to Fit”, “Zoom to Optimal Fit”, and “Zoom 1:1”. Depending on your particular need at that moment, these different buttons will automatically fit the window to the displayed image zoom factor in several different ways, making the most of your valuable desktop real estate. I find the “Zoom 1:1” feature handy when needing to see & correct some minor detail in my data, like hot and cold pixels. Note how the title bar zoom factor display helps you track of what you’re actually looking when switching between the zoom modes.
That should provide you with enough basic information to make your way around the PixInsight environment. Now let’s talk more about Image windows, and things that may be done with them.
Images and Masks
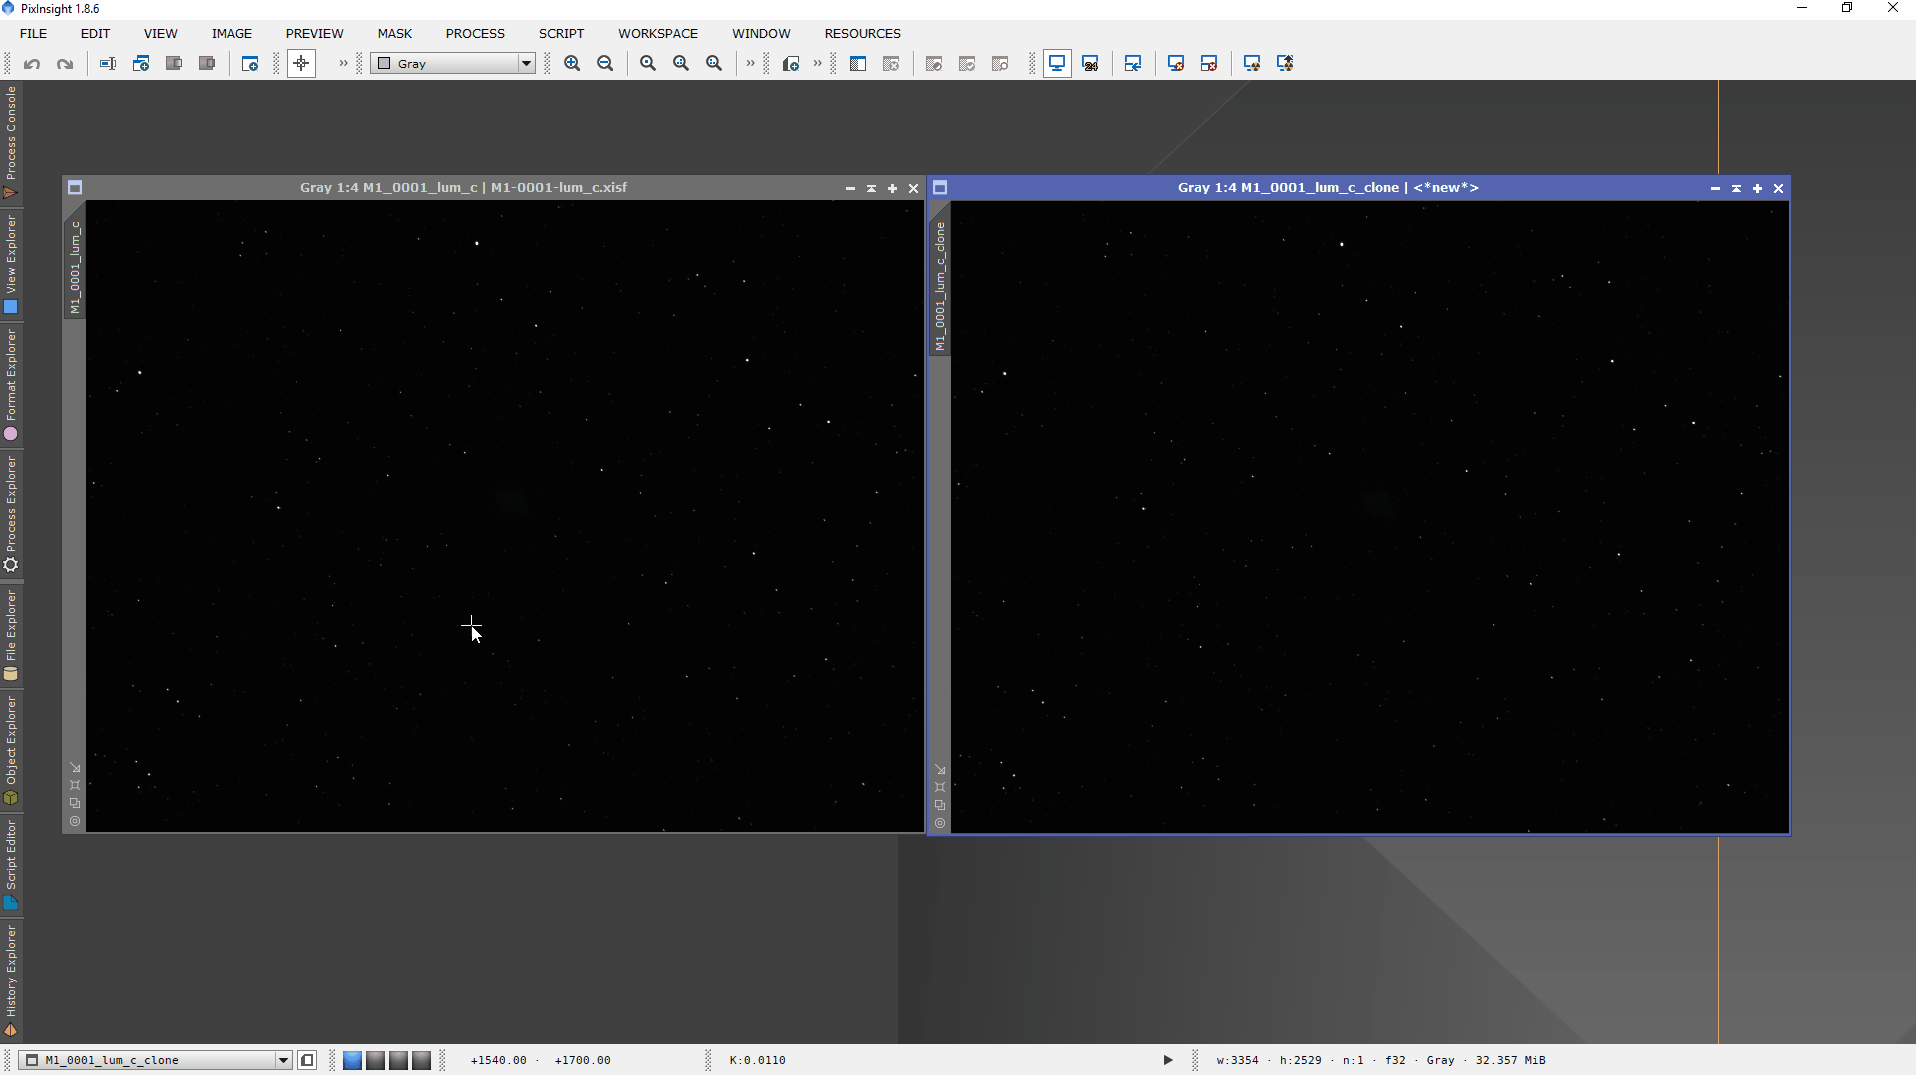
PixInsight makes creating and experimenting with variations images a breeze, as you can effortlessly create multiple working copies of the same image in memory without risking the original data. You can test various functions on these working copies to see how they turn out, with no ill side effects to the original image they were created from. By leveraging the Apply drag and drop method we covered above, applying the same settings to many copies of an image is quite easy. I encourage heavy use of duplicating images to test out functions. It’s a fail safe way to ensure your processes and scripts work as intended. To create a copy of an image, simply click and drag the image’s Main View tab to an empty portion of the desktop. Alternatively, you can right-click the tab and select “Duplicate”.
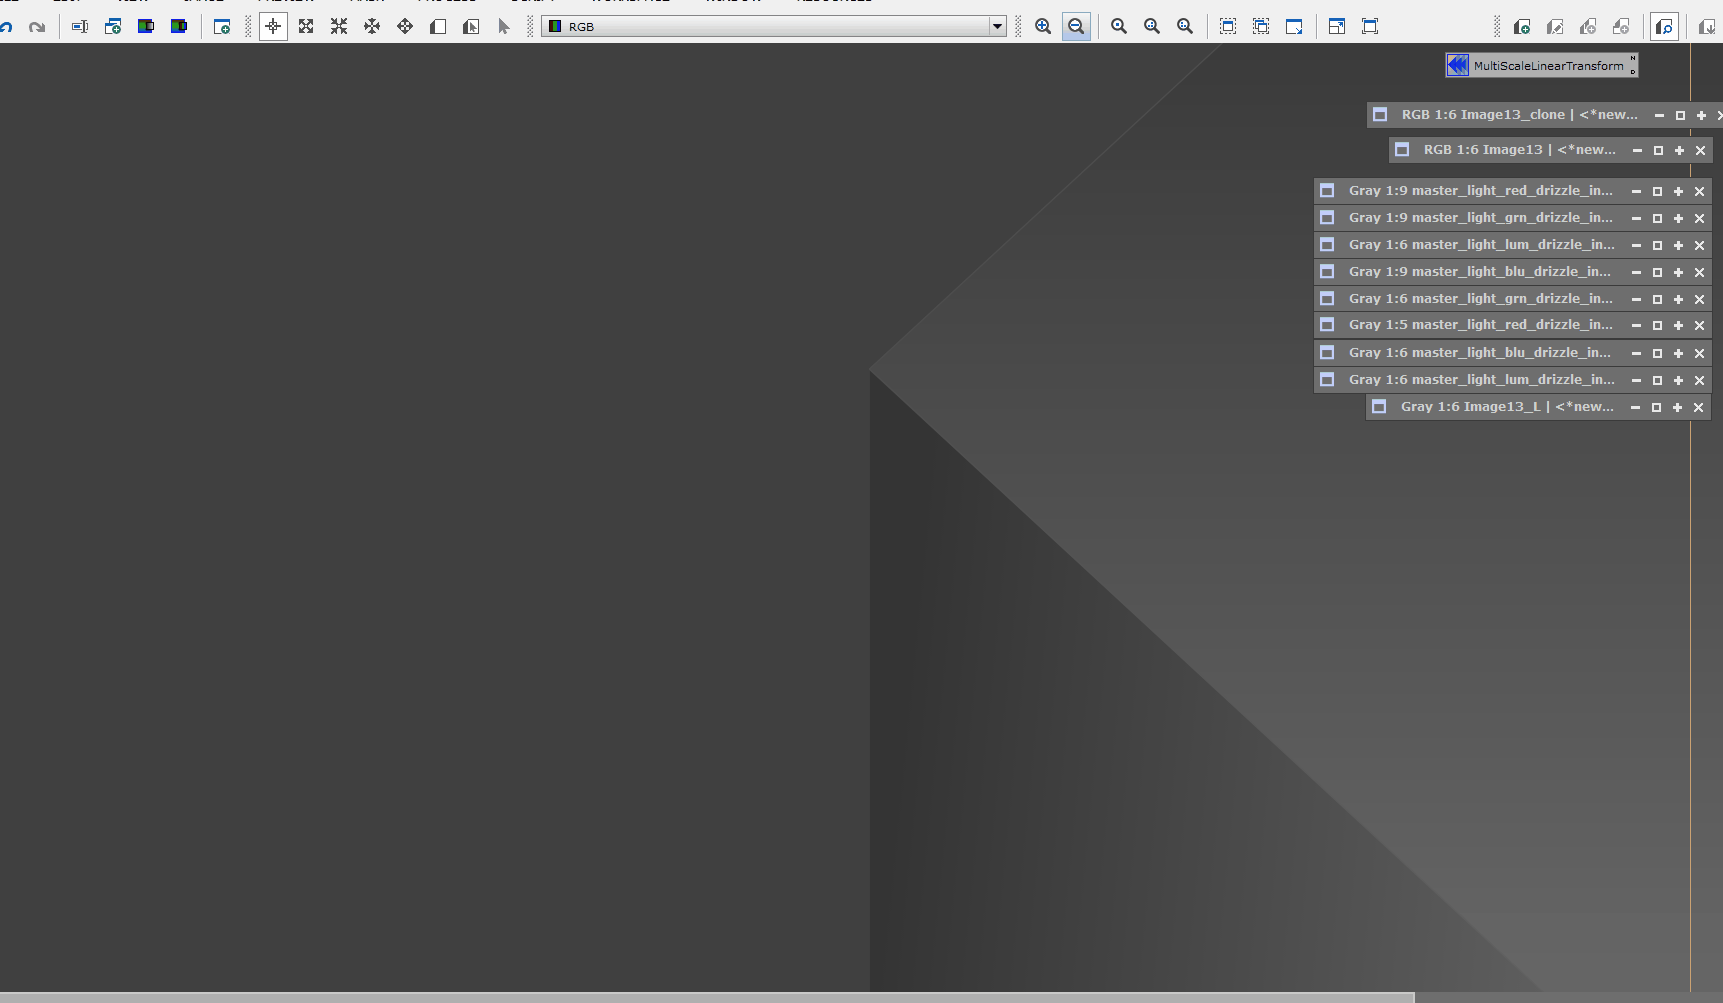
Your image will be duplicated, and presented on the desktop with the identifier “clone” as a suffix. Notice that even our STF Autostretch application was duplicated.
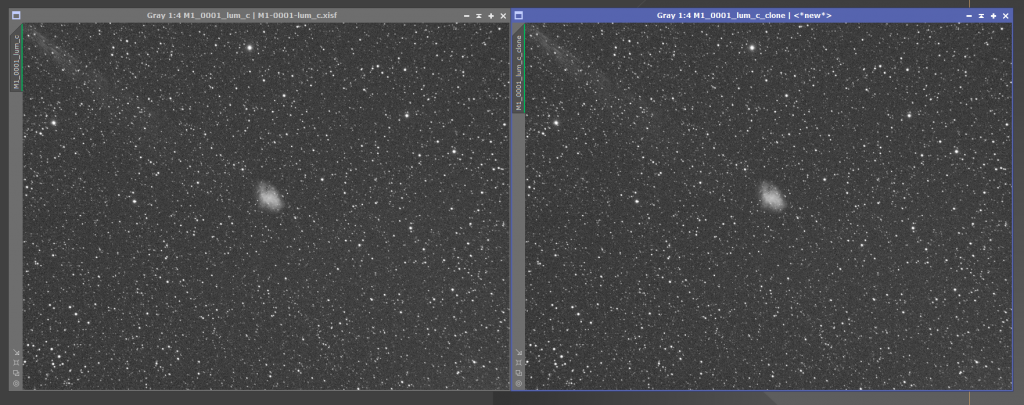
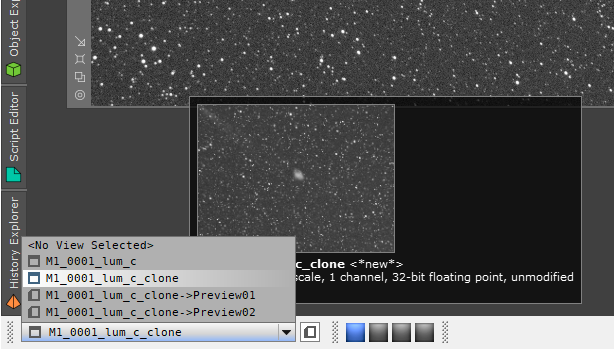
Our clone can now be manipulated and modified any way we see fit; it is a completely independent copy of the original. Notice that the toolbar shows “<*new*>” as the filename, as it hasn’t been saved out to disk in any form. You’ll likely find this feature in PixInsight promotes many copies of Image windows on your workspace desktop, and helps you keep track of your stages of work as you proceed through the workflow. The view selection menu that we covered in the basic interface section becomes highly useful once your workspace grows beyond a handful of windows. It even provides a nifty floating thumbnail! Notice how I’ve enabled the Preview button to also display previews in the list, and how they’re clearly represented to the image from which they are generated.
Anyone familiar with Photoshop or GIMP will understand the purposes of masks. In PixInsight, masks perform a similar function by allowing you to protect certain areas of your image while allowing manipulation of the remainder. Masks often are used in conjunction with image duplicates. After duplicating an image, it can be modified with the various PixInsight Processes or Scripts to accentuate or eliminate desired portions of the image data, such as stars or deep space areas of interest. Then, after these modifications are applied, be used as a mask to apply to the original source image.
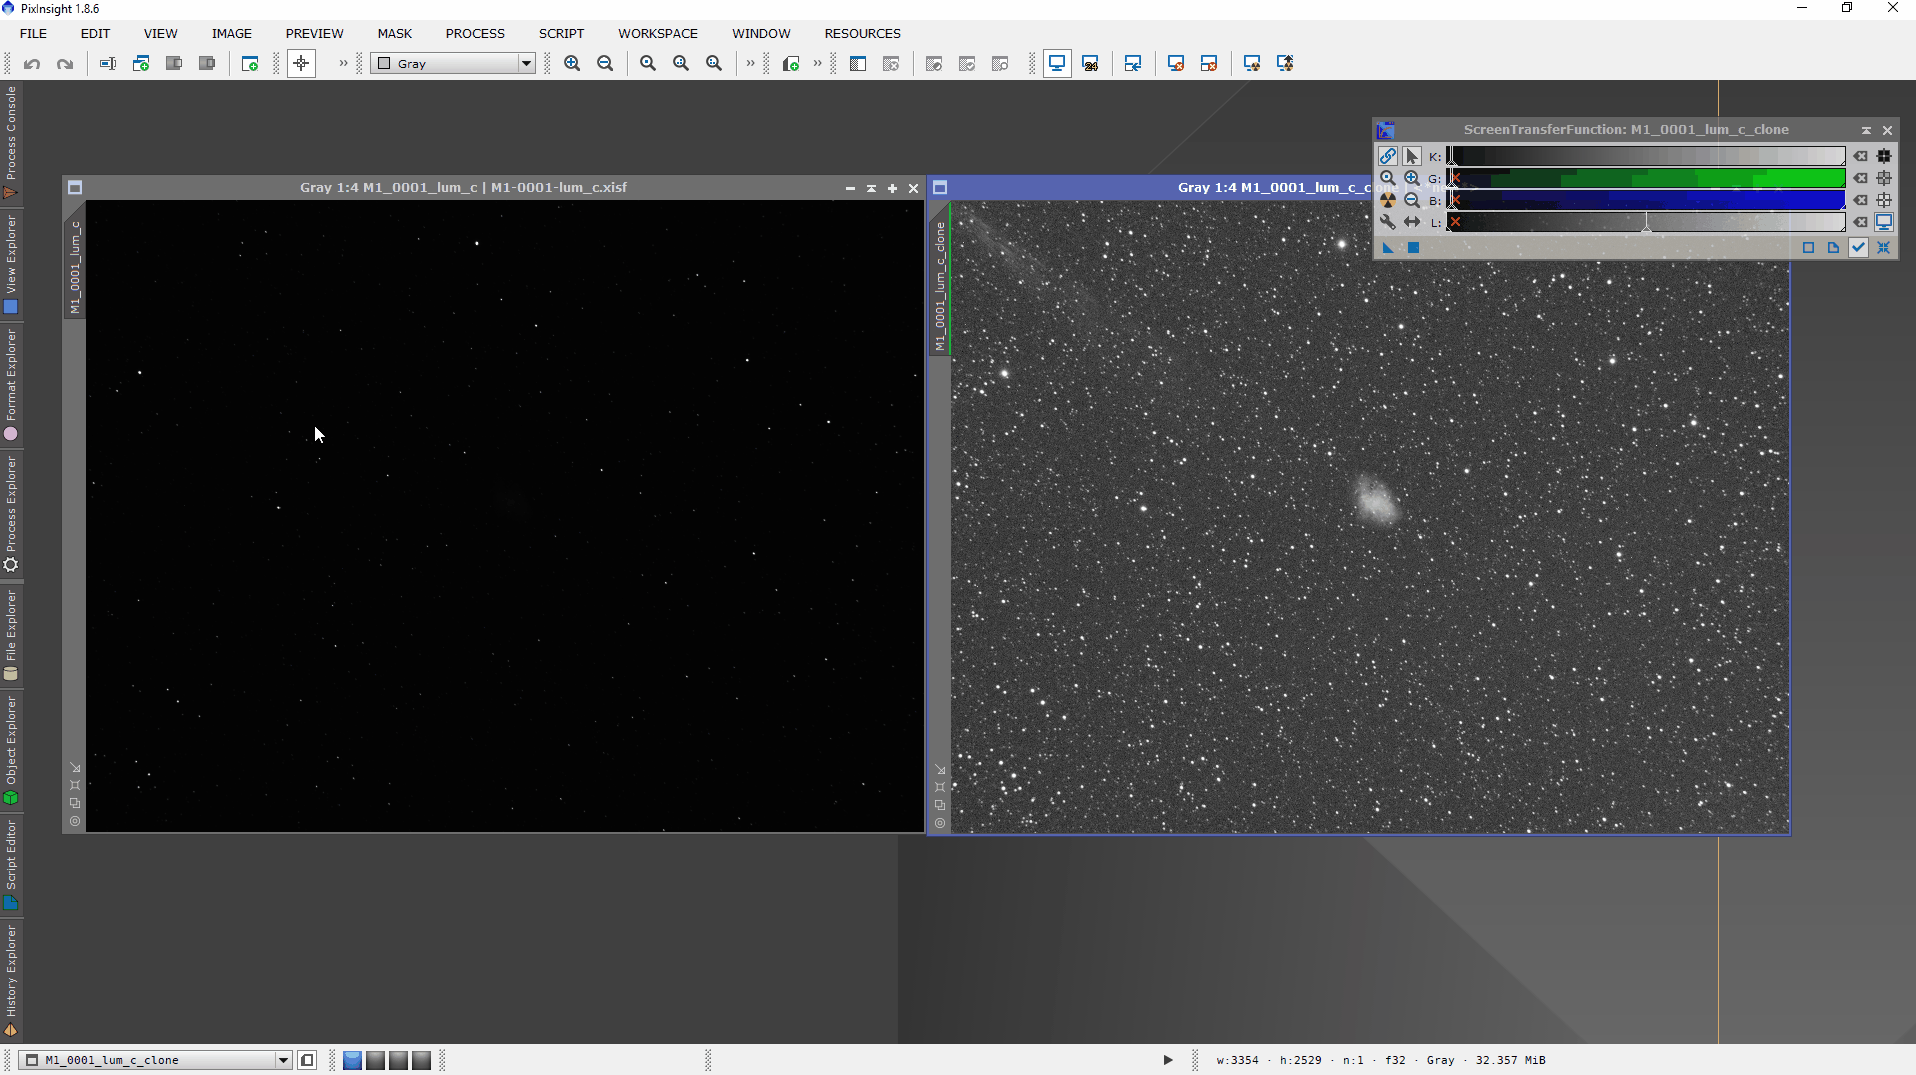
I’ll walk you through and example. To start, I have reset the STF Autostretch on both the original master image and clone by clicking “Reset STF Functions” on the toolbar. This puts both images back in to a linear display state.
I still want to screen stretch the image, but I need to first launch the full version of the ScreenTransferFunction process from the Process Explorer drawer, and apply it to our clone image by clicking the nuclear button within the process window. Doing it in this manner with the full ScreenTransferFunction Process versus the shortcut on the ribbon toolbar allows us to capture the settings that the ScreenTransferFunctionapplies.
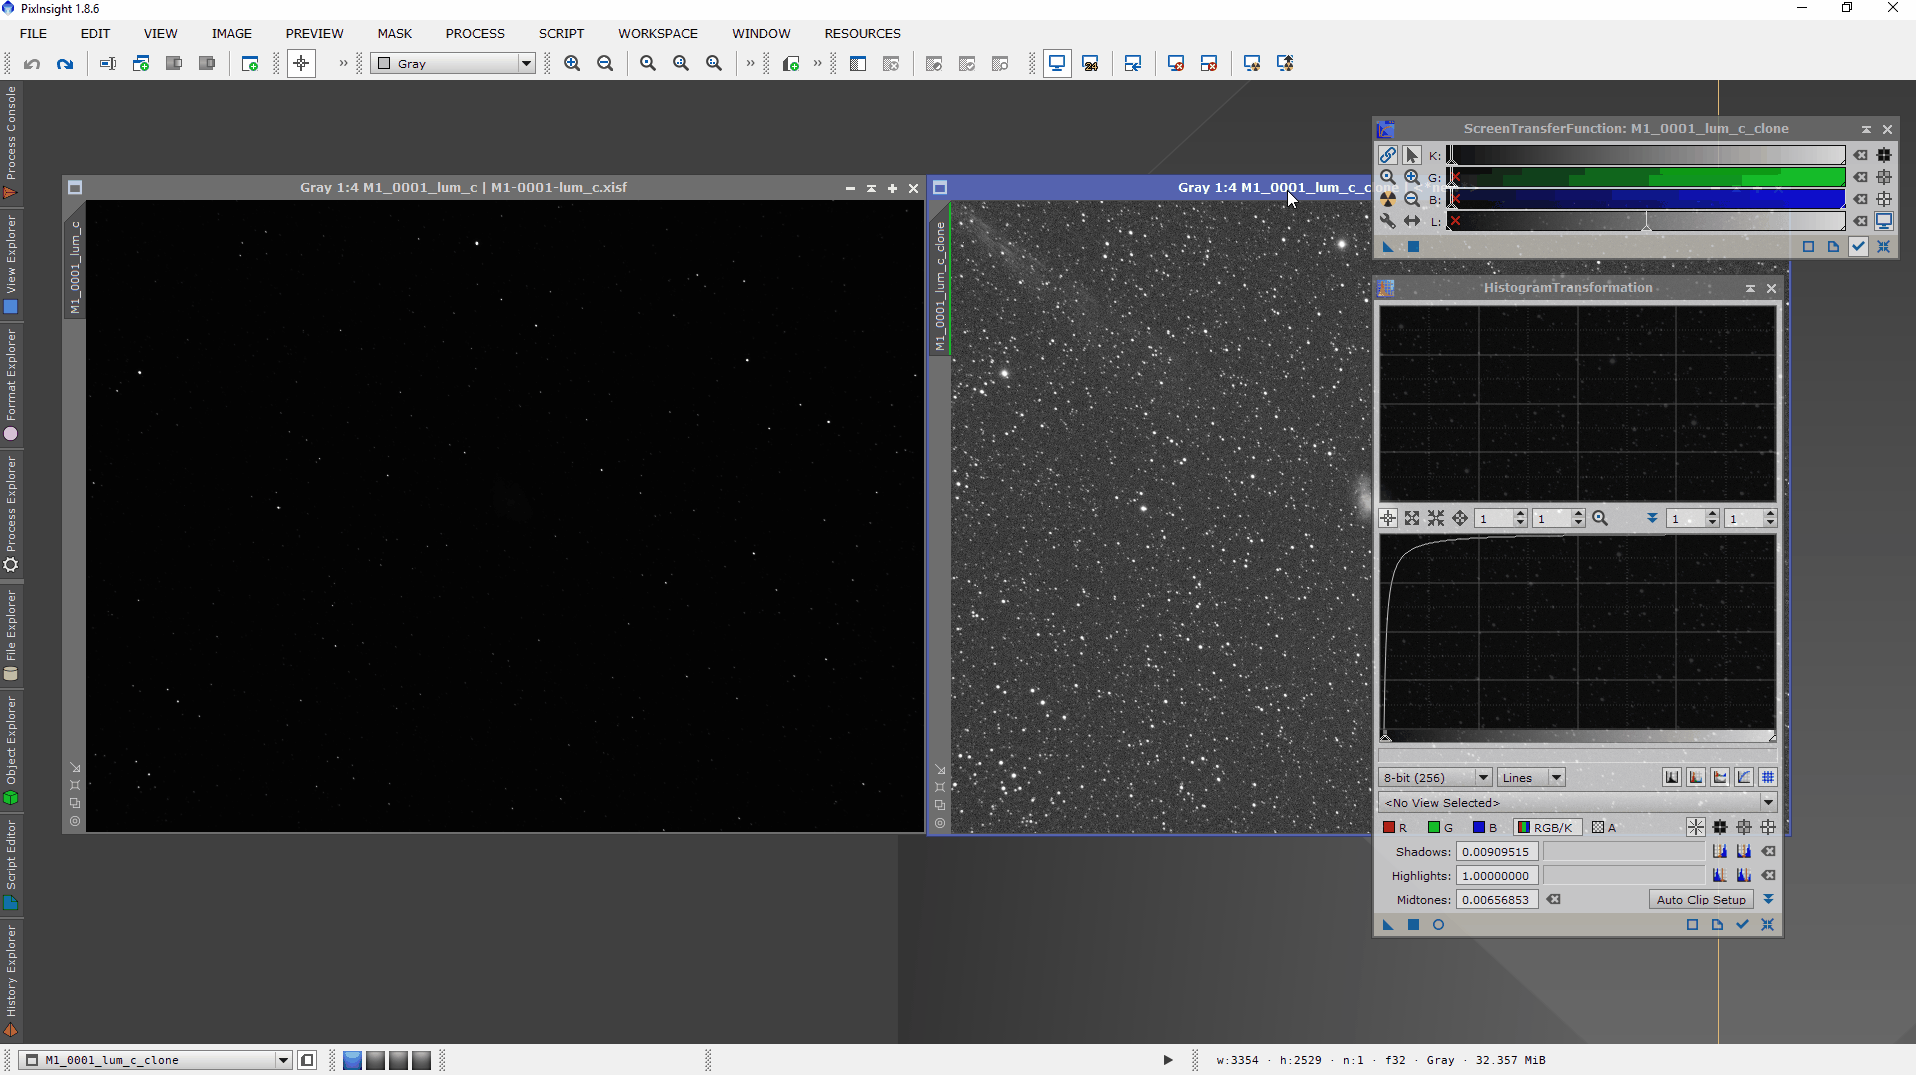
Now that we have the ScreenTransferFunction settings available to us, we can use its triangular apply icon to transfer the settings into the HistogramTransformation process, which is used to permanently stretch the image data. I use the Process Explorer once again to launch Histogram Transformation, and drag ScreenTransferFunction’s apply icon onto the bottom tool bar of HistogramTransformation. This copies the settings across exactly and set us up nicely to apply the permanent stretch.
Now the HistogramTransformation settings are good to go, we can once again reset the ScreenTransferFucntion Process back to defaults by clicking the reset icon in it’s toolbar, thus removing the screen stretch from our clone.
Finally, we apply the permanent stretch by ensuring our cloned image window is active, and then clicking Apply on the HistogramTransformation window.
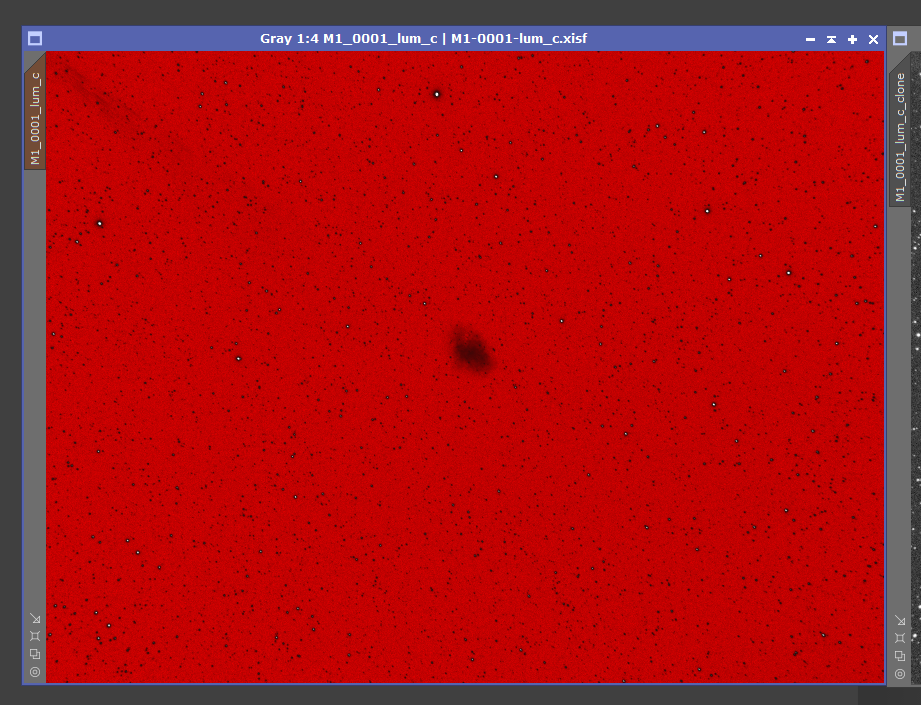
Now the image is permanently stretched, we can close the HistogramTransformation process, use our stretched clone as a mask to the original. I do this by right-clicking the original image, and from the context menu selecting “Mask” > “Select Mask”. From the pop-up box that appears, I can select the clone or any other image window I may have open. As a short cut, you can also drag the clone’s Main View tab from the clone image window into the View tab tray of the original image.
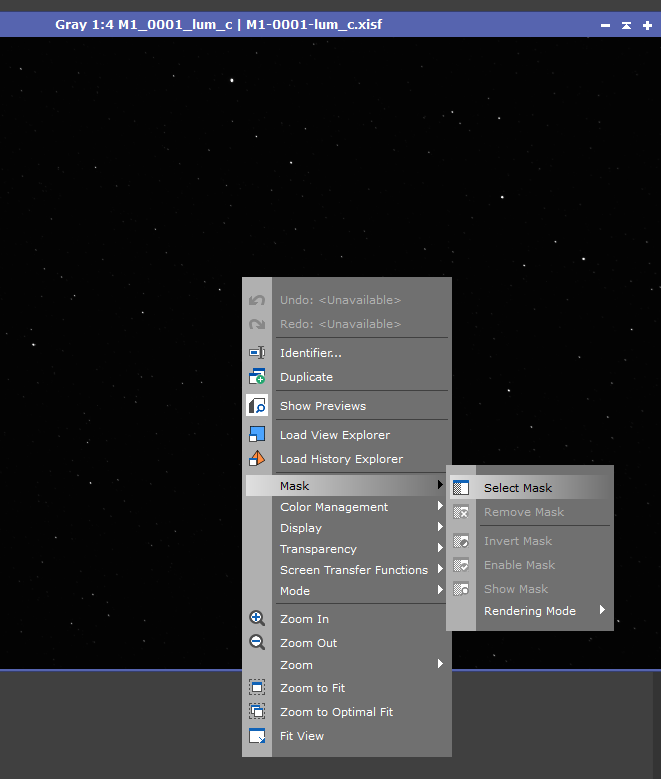
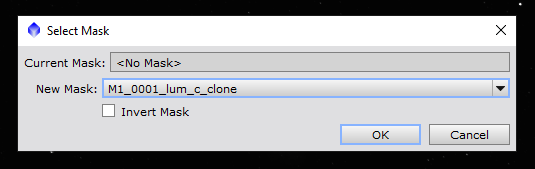
After clicking “OK”, our mask is now applied. The masked areas in the image are represented by the red highlight while the other areas are free to be modified by other processes. Also notice how our Main View tab takes on a red hue as an additional reminder that the Main View has had a mask applied. Additionally, the Mask context menu available by right clicking allows you to easily invert the mask, change other things such as the mask color on-screen, or remove the mask entirely. I find the Invert feature quite helpful for masking and unmasking bright objects, like stars versus the sky background, in an easy way.

While the intent of this demonstration was to show how masks are applied to images, it also served as an intro to the power behind PixInsight’s unique settings handling mechanism in Processes & Scripts. We quickly duplicated settings from one Process into another by simply dragging an icon across the windows. Similarly, we could have saved those settings for future use by using the same icon dragged to the desktop, as we covered earlier in this tutorial. These features quickly become second nature during your work, becoming indispensable time savers as your experience with the tool set grows. Now that you’re more familiar with Image windows, Previews and Masks, let’s cover Processes and Scripts in a bit more detail.
Processes and Scripts
Processes and Scripts are the fuel behind PixInsight’s engine. These features give you a vast array of powerful tools in which to manipulate and fine tune your astronomical image data. The difference between and Process and Script is a bit menial: a Process is a feature that has been incorporated into the PixInsight software natively, while Scripts are still in development. At first the sheer number of Processes and Scripts available can seem overwhelming–but excellent documentation is available to help you learn your way through the vast selection. Since I find myself using the documentation quite a bit, let’s start there.
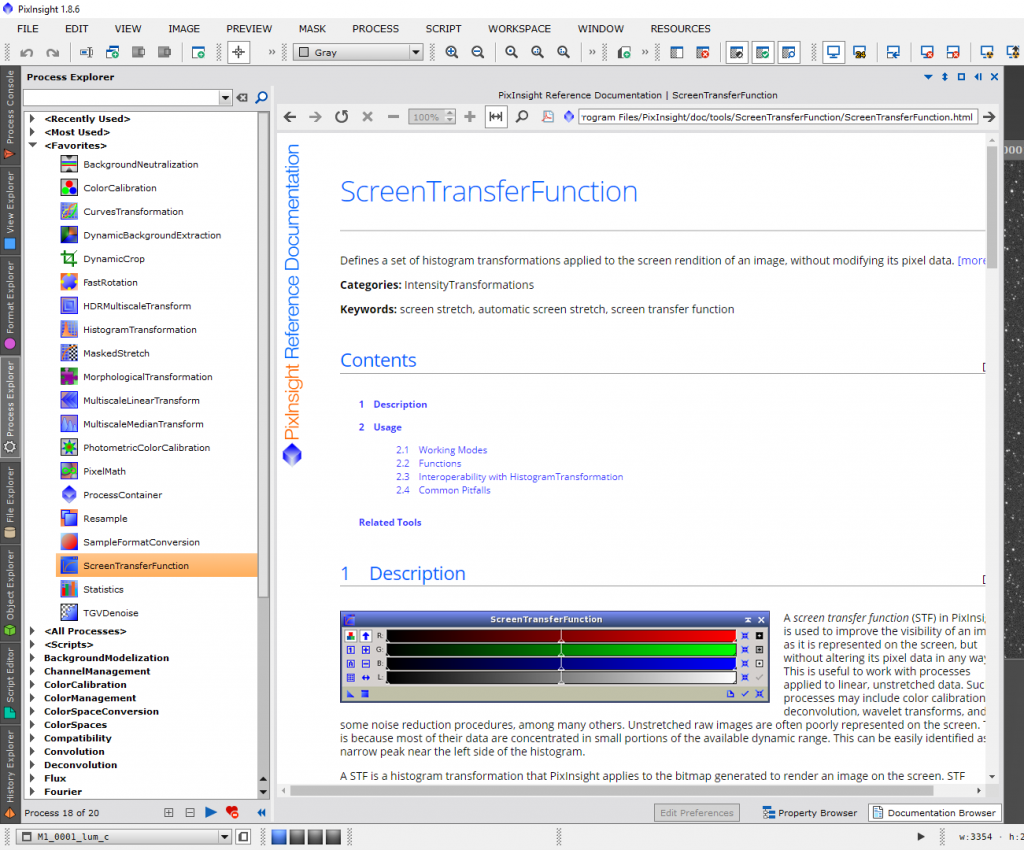
By clicking the Process Explorer tab, once again the toolbox drawer is presented to you. Let’s select our old friend ScreenTransferFunction again. This time, instead of double-clicking, simply select it with a single click. You should be presented with a comprehensive documentation page. If you don’t see this, ensure the “Documentation Browser” button in the lower right is selected.
PixInsight’s documentation regarding Processes and Scripts is excellent in most cases. Not only does it explain the applicable use case for most Processes, but often it supplies tips from the developer to help use them more effectively or perhaps pitfalls to avoid. While an exhaustive rundown of every Process in PixInsight is well beyond the scope of this document, we will certainly be covering many of them in more depth as tutorials are added to this site. You’ll likely find that you only use maybe a dozen or so processes regularly, while the vast majority of the remainder tend to be used in fringe case scenarios, perhaps where you had a particularly noisy image or trying to solve a defect that was not correctable via normal means.
Let’s once again launch the ScreenTransferFunction by double clicking it in the Process Explorer list.
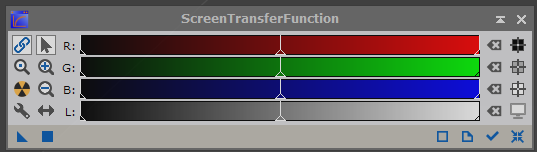
You’re already familiar with the nuclear autostretch button. The rest of the Process features are well covered by the existing documentation within PixInsight, and we’ll be tackling those in future tutorials. For now let’s focus on the other options in the bottom tool bar of the Process. You’re already aware of the triangular “soft” apply icon, as well as the contextual square apply button. On the right side, you’ll find a few more icons. These are, in order from left to right, “Edit Instance Source Code”, “Browse Documentation”, “Track View”, and “Reset”. Many of these icons will be familiar, as they are common across Processes, and even some of the Scripts.
We used the Reset function briefly in a prior example, but in any given Process or Script, this quickly allows you to revert the settings to the state they were in when the Process was launched. Browse Documentation is a handy shortcut to re-display the Documentation available via the Process Explorer drawer, in case you check something again.
“Edit Instance Source Code” is a very, very powerful feature. If so inclined, PixInsight lets you modify the behavior of the Process down to a programmatic level!
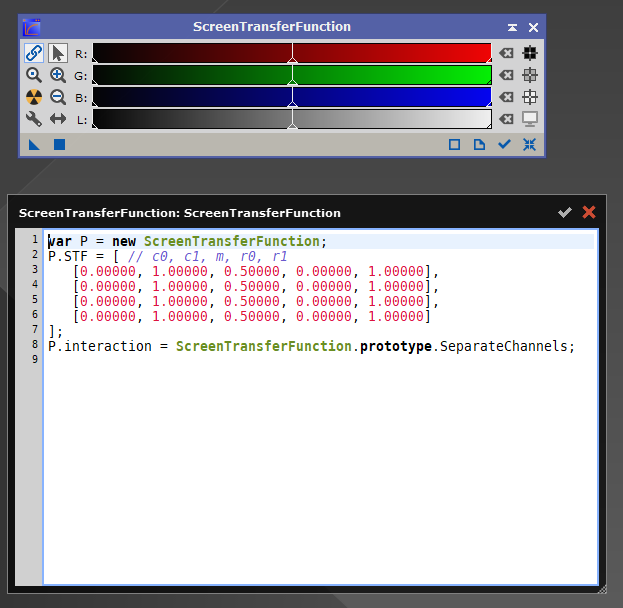
To be quite honest, this feature is beyond my meager capabilities, but it’s good to know it exists. Everything in PixInsight is written in JavaScript and the software itself can be considered a development framework. Thorough documentation online is available for those capable of scratching out their own code. The transparent and extensible nature of the platform is what makes PixInsight so powerful. If you leverage this feature, be aware it only modifies that instance of ScreenTransferFunction. If you close the process without quick-saving it’s settings to your workspace desktop via the apply icon, you’ll lose your code changes. However it’s also nice guarantee that the stable, working versions of the Processes are safe from accidental breakage.
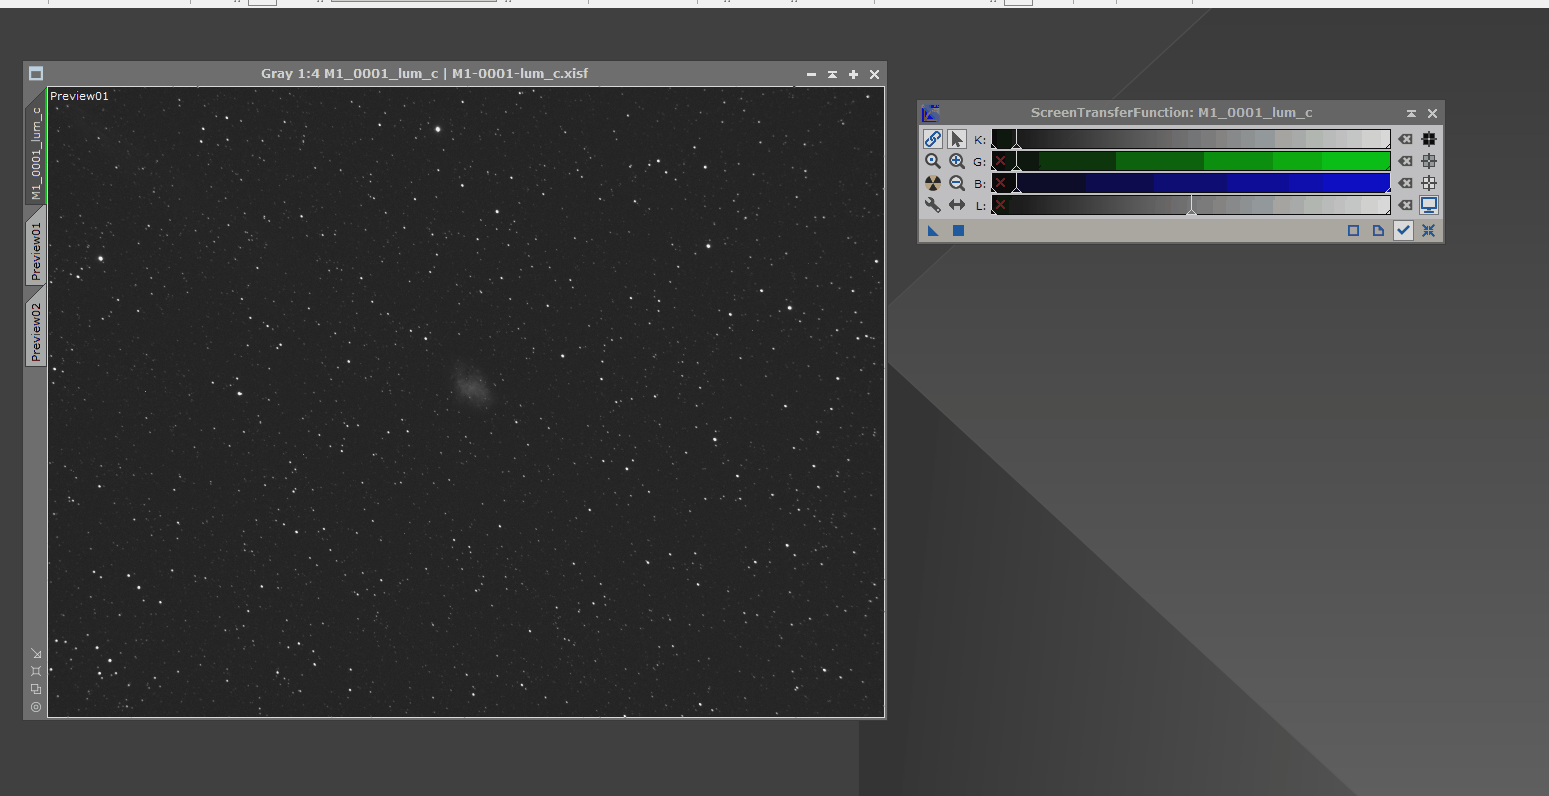
Let’s now turn our focus to the “Track View” button. I’ll use this feature to illustrates the power behind Previews. I start by opening a clean version of our M1 image once again, and creating a couple previews.
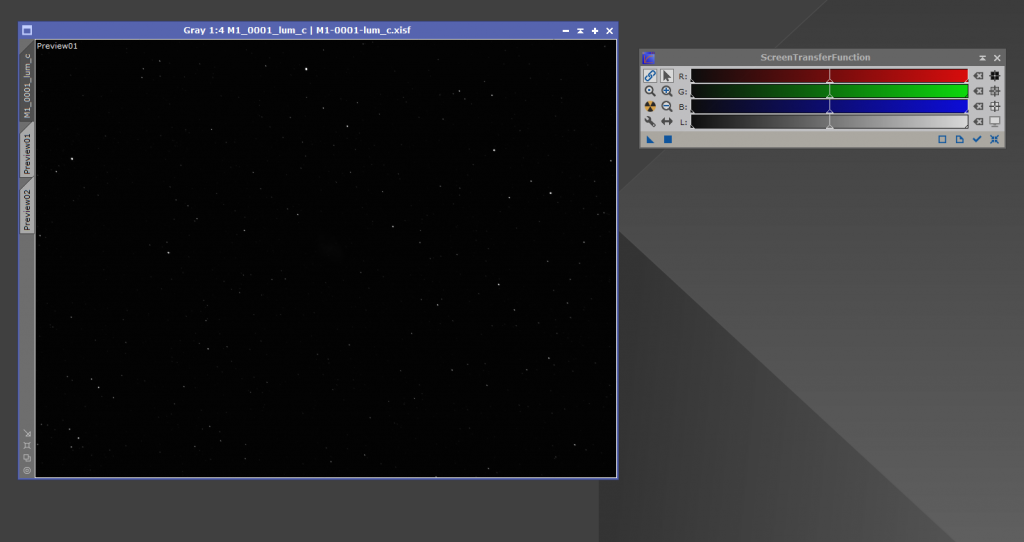
Next, I press the “Track View” button to enable it. This feature enables a live update of changes I make in the ScreenTransferFunction to the selected view on-screen.
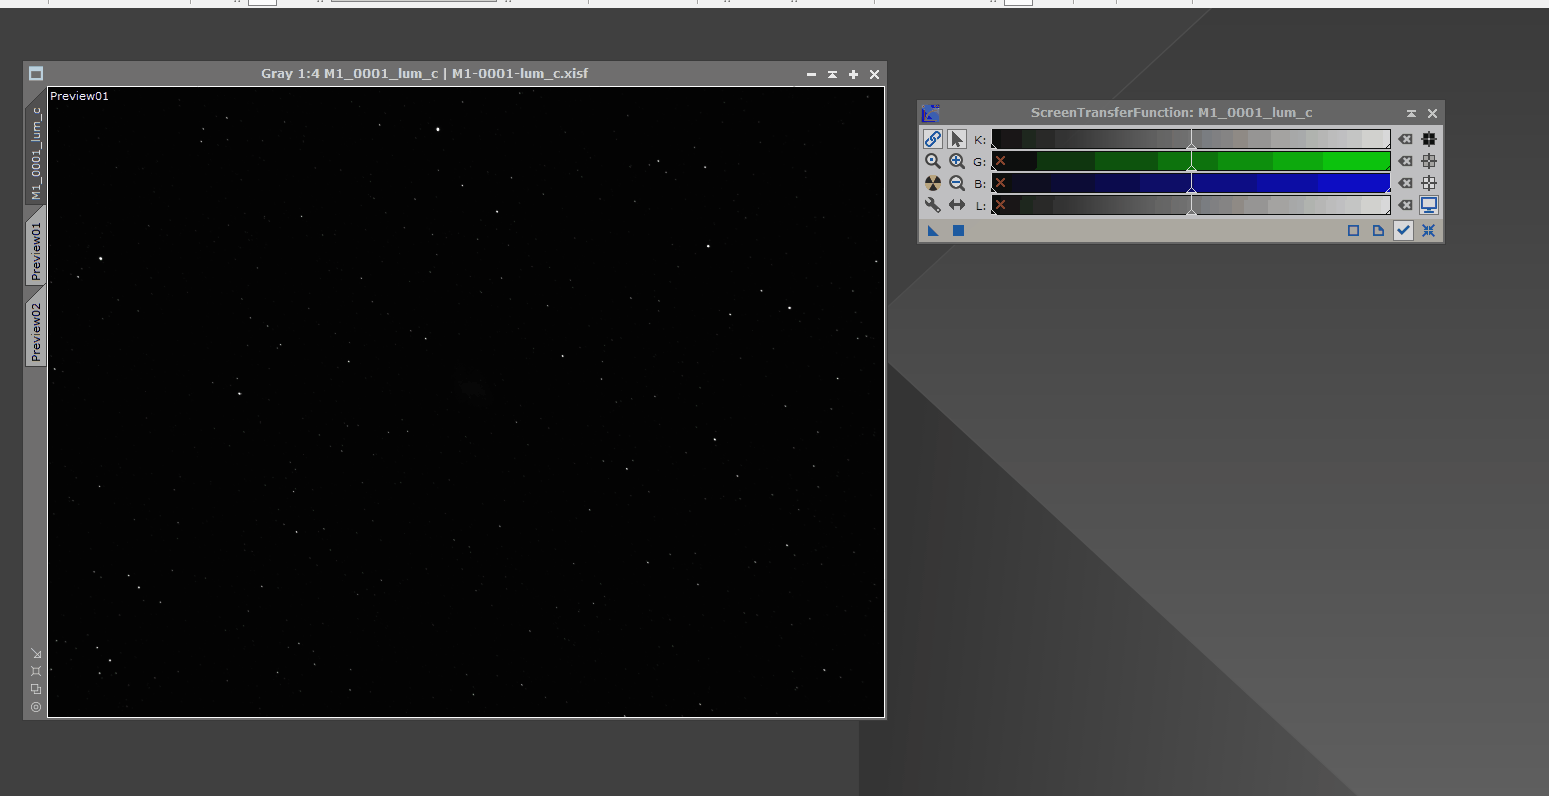
Now look what happens with our Previews. By default they stay unchanged, not effected by what our ScreenTransferFunction did to the primary view. Notice that I can independently adjust each Preview to have different settings than the other views. Using the “Track View” (sometimes called “Live Preview”) on Processes allows you to get very accurate and instant results as you fine tune your data.
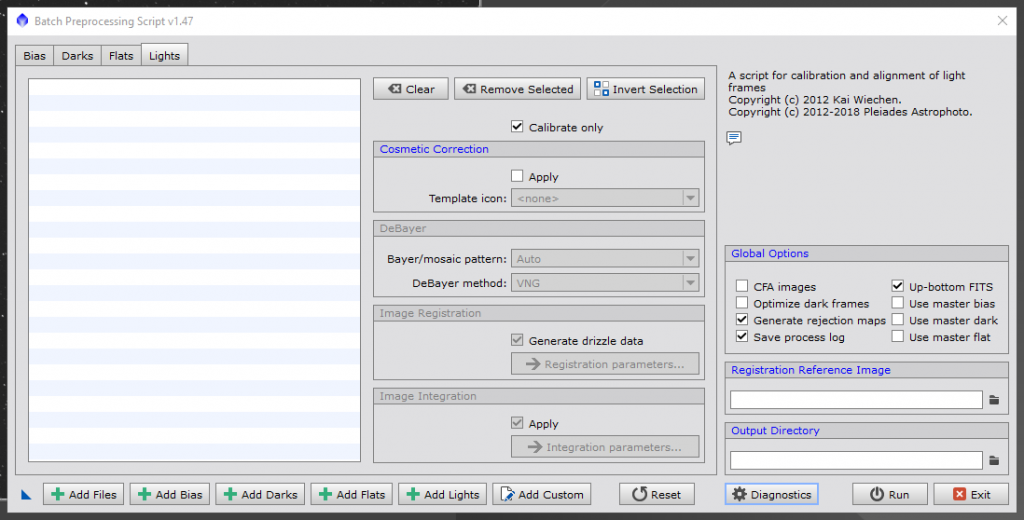
Up until now, we’ve been focusing on Processes, but haven’t talked about Scripts much. Scripts, due to their work-in-progress nature, tend to have a bit more fluidity in their interfaces versus Processes. Below I’ve launched the Batch Preprocessing Script, which can be used to quickly calibrate, integrate, and stack your images. Notice how much more dense the interface is: It contains tabs, buttons and lists. Clearly this Script is doing quite a bit more than ScreenTransferFunction, but often you’ll have to take some time to familiarize yourself with the nuances of the various Script options. However, like true Processes, Scripts often still allow you to save their instance settings via the triangular Apply icon, the Batch Preprocessing script being no exception.
The Toolbox
We’ve used the Process Explorer drawer of the toolbox several times already, but haven’t talked much about the remaining options. As we wrap up our Introduction to PixInsight, we’ll briefly touch on the purpose of each of them, with more in-depth tutorials being later installments. Beyond giving you the ability to launch and refer to most of PixInsight’s core processing power, these various toolbox options let you peer into the engine of PixInsight as well as delve deeper into you imaging data and capabilities of the software.
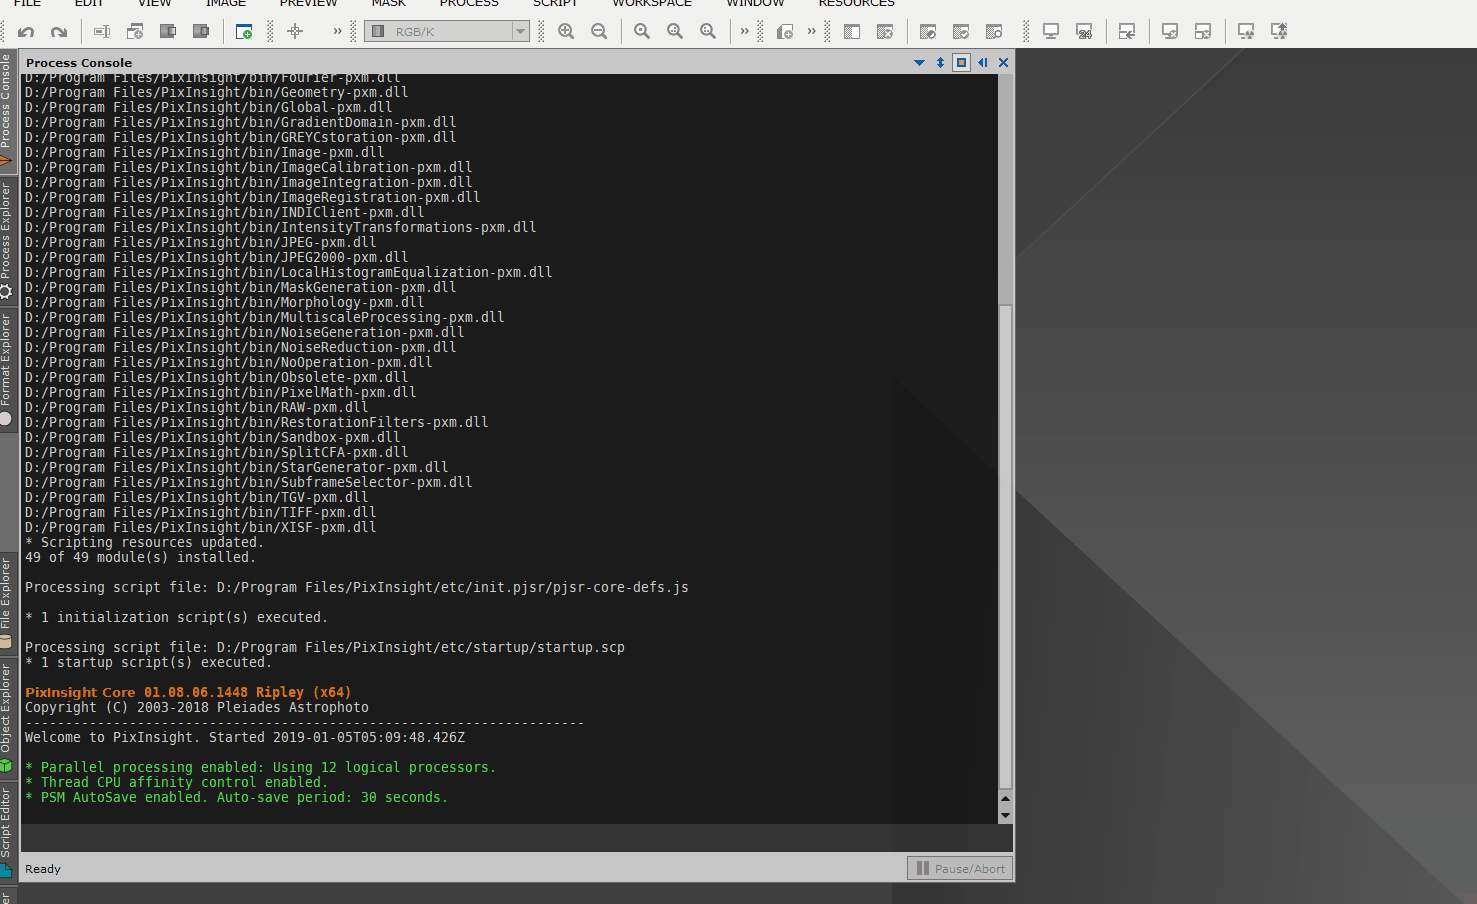
Process Console
Let’s start off with the the console. In most modern versions of PixInsight, this is likely the first activity you see as the software launches, with a bit of diagnostic data and status messages being displayed before it slides back off into the Toolbox. By clicking the Process Console again, we are able to see what PixInsight was telling us.
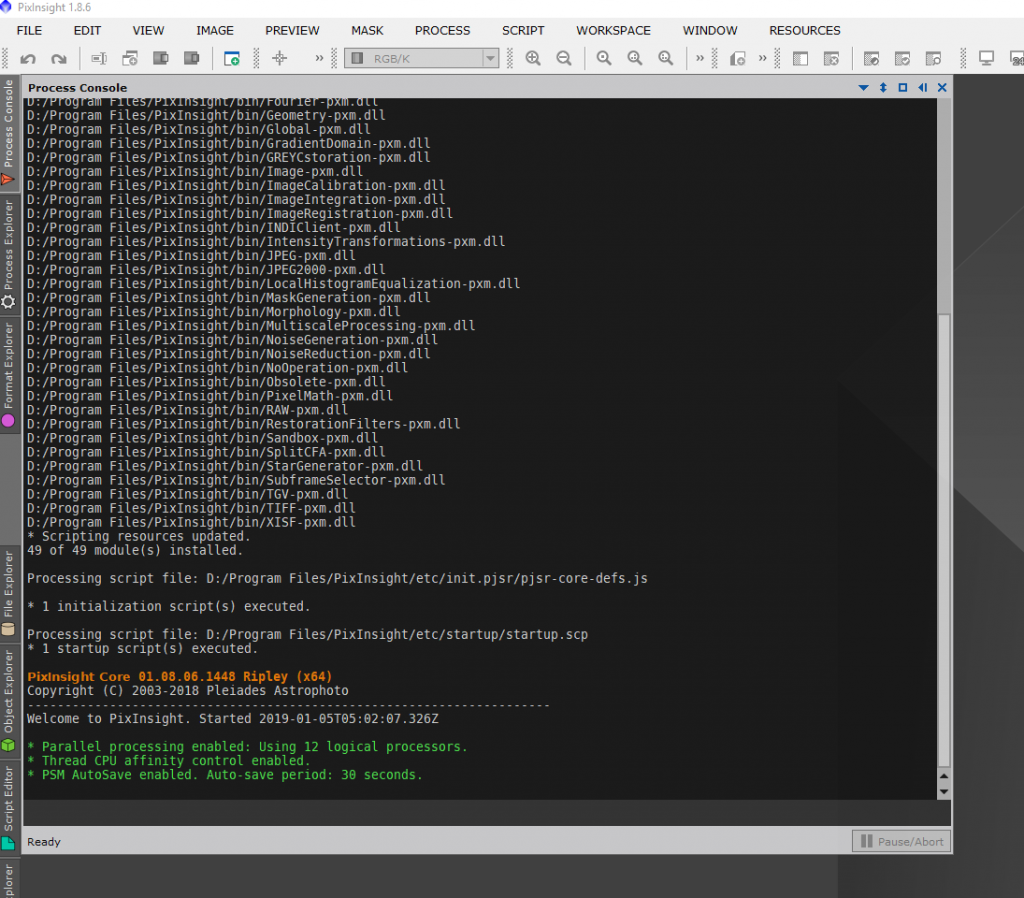
This is a dead giveaway to the modular nature of the software. As you can see above, the console displayed information regarding various libraries and scripts being loaded at launch. This console will also display debug output as work is performed by Processes and Scripts. Processes such as the ImageIntegration are quite processing intensive, and much information can be gleaned about the effectiveness or errors by monitoring the output in the Process Console. But the Console is not only a display, it is also a Command Line Interpreter for the PixInsight engine. This is extremely powerful, and but allows advanced users and developers of PixInsight far more sophisticated than myself to perform incantations of voodoo to the inner workings of the application. The documentation available on line is well stocked if you decided to jump to the dark side of Image processing 😉
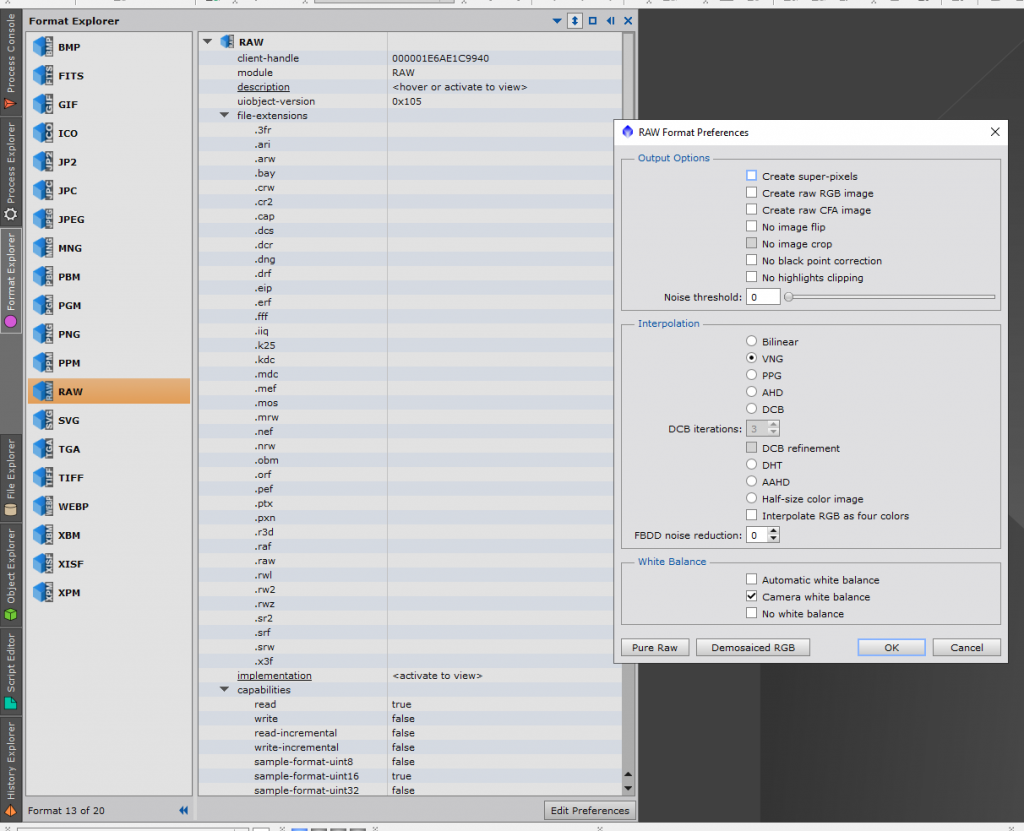
Format Explorer
This Toolbox drawer allows you to modify specifics on how PixInsight handles various image formats. By opening the drawer and single-clicking an entry, you’re provided detail of the current metadata of that image format. If you double click the entry, a dialog box will appear that enables you to adjust format-specific settings accordingly. For example, the JPEG format settings permit modifying the compression level. RAW format offers customization of noise level & output options, Interpolation algorithms, and white balance options, and so on. More often than not, DSLR imagers may find more use for this than CCD imaging folks. I rarely find reason to poke these settings much, other than the occasional special situation where another piece of software is expecting a very particular format attribute or metadata header.
File Explorer
This drawer can be used to traverse the file system of your hard disk, and is useful for looking at specific metrics of files such as file permissions, size, modification date, owner, etc. Beyond this basic functionality the tool is rather limited; it’s not effective for moving, copying, or deleting files, only looking at them and in the case of images, opening them within PixInsight. I find it to be quicker simply to alt-tab and use the operating system’s native functions for that. Further it seems the current implementation of File Explorer limits it only to the C: drive. If, like me, your image data is stored on a larger secondary hard disk, File Explorer proves rather useless. Hopefully in the future Pleiades Astrophoto will continue to enhance it’s features.
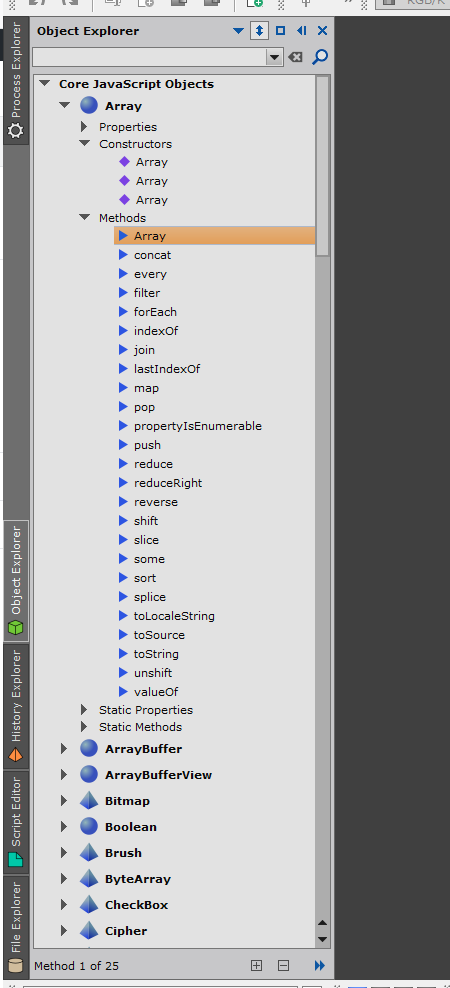
Script Editor & Object Explorer
These toolbox drawers are developer tools functioning as a code editor and reference for the myriad of JavaScript capabilities available. The Script Editor is a code editor with syntax highlighting, debugging, and execution capabilities turning PixInsight into a full-fledged Integrated Development Environment for image processing. It even has basic file/open/save functions built right in.

Complementing the Script Editor is the Object Explorer, which is PixInsight’s built-in reference for those developing their own code. By selecting a Constructor, Method, or Property of any of the listed objects, the user is presented with syntax information on how to implement it.
View Explorer
We’ve already discussed the View navigation menu at the lower left window frame of the PixInsight application for quickly switching between Image windows. The View Explorer offers a more comprehensive version of this feature, providing complete status into every Image Window, Preview, and Cloned duplicate you may have open in your workspace. This is a very power organizational tool, as you’ll find yourself working with many different Views as you hone your skills in PixInsight.

Notice that at the lower right of the View Explorer, you are given options to Close, Iconize, Rename, Duplicate, and even Checksum a file to compare it against an existing file. In the center of the window is a vast array of metrics that tell you everything you could ever want to know about that particular View. I find myself using this later in the Post-Processing workflow when the number of Image View windows on the workspace desktop number in the dozens. Having them all listed out in an organized manner helps me track what was what, and rename them to something more memorable.
History Explorer
Last, but certainly not least is the History Explorer. This is an extremely useful tool that allows you to peruse the entire history, down to the specific Process configuration, of any given view that is open in your workspace.
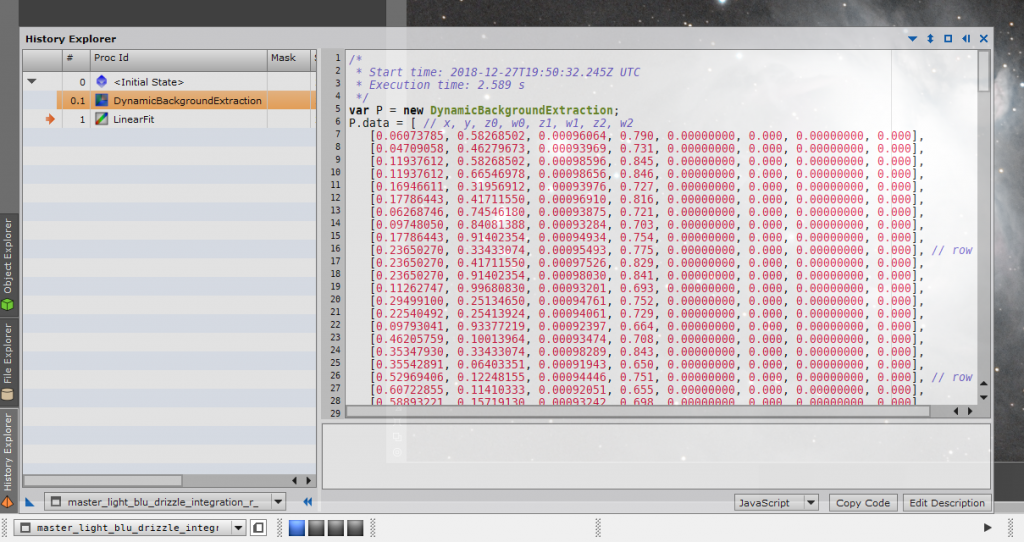
Effectively, the History Explorer is a recording journal of the processes and the configuration thereof taken throughout your image processing workflow. On occasion, I’ve found this extremely helpful in recovering Process results that I may not have saved via the normal Process save-to-desktop-icon method. By going into the History Explorer and copying the raw code of any given Process result and dumping into a new Instance of a Process via the “Edit Instance” button, you can recreate the results. Again, I would highly recommend not relying on History Explorer to repeat these functions, as it can be a bit nail-biting, but nonetheless it’s a very handy tool to have in your back pocket when mistakes are made!
Wrapping up
This very brief overview has no doubt left you with a sense of the vast capabilities of the PixInsight software, and perhaps even a little intimidated. Relax, you’re not alone! The tool is extremely powerful and versatile, but with some practice, will yield outstanding results for your image data. Stick with it, don’t hesitate to explore and experiment with the program on your own images. One of PixInsight’s greatest strengths is its ability to manipulate and modify your data in a non-destructive manner. If you get too far down a rabbit hole, get lost, or just plain overwhelmed, it’s a simple matter of closing that the image clone, or even just and re-open a fresh copy of the file off disk. PixInsight will never modify your original files unless you explicitly tell it to do so.
Try out new things, read up on the documentation, and check back here to Valley Astro often for more tutorials. We’ll be adding more soon.
I hope you find this helpful, and as always leave comments below if I messed anything up, or you’d like more clarification on any topic in particular. More important still, have fun!