
So you are interested in the world of amateur astronomy. I don’t blame you, astronomy is awesome!
After all, what other hobby can see back in time? With just a telescope you can crawl the ragged crater rims of the moon or peer at the dusty rings of Saturn. Sift through the explosive after-effects of stars long dead, or gaze in wonder at the birth of new ones. Ever since I was a kid, looking up into the night sky instilled a feeling of curiosity that has never faded as I’ve aged. Even today looking through a telescope I get a sense of awe and scale that is rivaled by nothing else.
If you are also intrigued by those things, this is definitely the right hobby for you. But even more so than the average hobby, astronomy is a journey of learning. I’ve made many mistakes and wasted money over the past ten years I’ve seriously been into the hobby, and did a little diving back into my past learning experiences to share six things that surprised and/or confused me back when I was getting started.
Hopefully it helps you get started more quickly into this exciting past-time and saves you some frustration as well.
Table of contents
Set Your Expectations
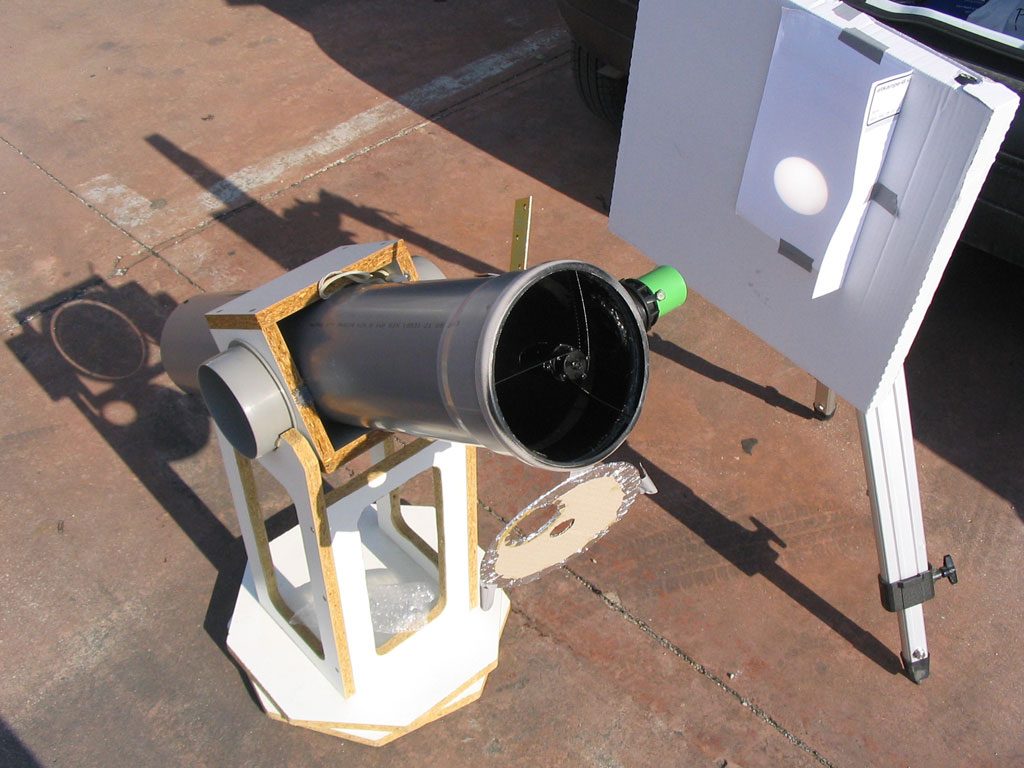
The internet is full of bright pictures of nebulae, planets and galaxies in the night sky. While these look gorgeous on your screen, the truth behind these pictures is that they were highly processed and took many hours to produce. The colors that appear to pop out of these images don’t really exist in nature, and while they look beautifully bright and crisp, the naked eye looking through the average telescope is going to see a faint smudge of glow on the lens.
Many of the highly detailed images were taken by telescopes orbiting in space, far removed from the blurring effects of the atmosphere. Pictures such as these would’ve been extremely difficult or impossible to take from the ground.
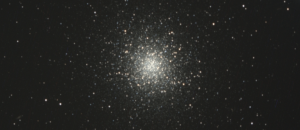
In order to get enough light data to make these images, astronomers use specialized telescope equipment and cameras designed to take extremely long exposures of these dim objects. The exposures often span minutes. Dozens or even hundreds of these exposures are taken, and individual frames are combined, in computer software, to create one brighter picture. The resulting image is heavily processed in even more computer software to pull out fine details, remove camera sensor noise compounded over hours of exposure, and finally artifically color enhanced to make it “pop”.
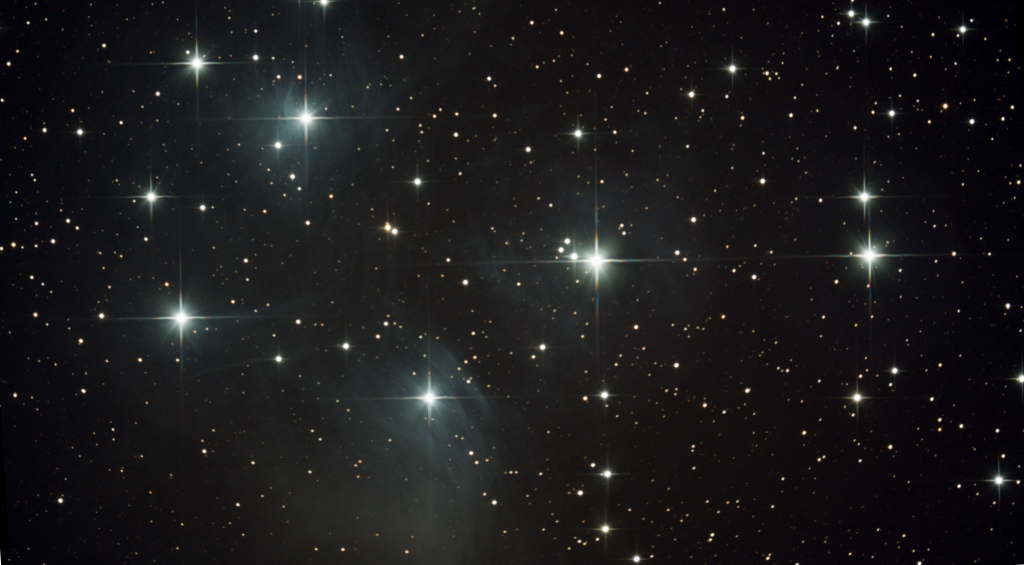
All that being what is, you will enjoy looking at things with the naked eye. There many objects to view that look even better to the eye than they do in photographic images, in my opinion. For example, the pale blue star Vega. It looks like a gleaming diamond to the eye, while pictures just don’t do it justice. There are even faint deep space objects that are viewable to the eye with dark enough skies. The Orion Nebula and Andromeda Galaxy are a couple.
Set your expectations ahead of time, and don’t expect to see technicolor space pictures through your eyepiece.
Cheap Telescopes Are Just That
As the old adage goes, you get what you pay for.
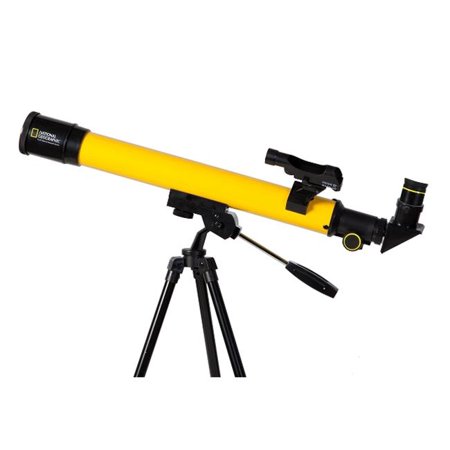
Retailers often sell cheaply built telescopes with flimsy, rickety mounting hardware and subpar optics. You should avoid these. If you’re reading this article, it is highly likely you have more than just a passing interest in the Cosmos, and these toys are not worth your time nor money.
While some of these cheaper telescopes may suffice for viewing bright, close objects such as the moon, they fall short on everything else. In general, avoid anything co-branded by television channels or magazines, often found at a generic retail store, or sold next to household appliances and children’s toys. There are several manufacturers of quality telescopes which are easy on the wallet and still deliver great viewing. These higher-quality scopes will be better built, more adjustable, and accommodate higher levels of experience gained over time.
Budget-wise, for a basic telescope that can look at planets with decent detail and a few brighter deep-space objects like the orion nebula, expect to pay $300-500 dollars. For a telescope capable of pulling in deep space objects, like the Pleiades and the Andromeda galaxy, $500-$800 is a good estimate. These prices are general guidelines and under great weather conditions smaller, inexpensive scopes can even see fainter deep space objects. However investing in the right tool for the job will pay dividends when viewing conditions aren’t perfect—which truthfully, is a majority of the time.
The Magnification Myth
Avoid being drawn in to any telescope advertising very high magnification levels. High magnification does not deliver detailed, sharp views and magnification isn’t even determined by the telescope—but rather the eyepiece. Any telescope is capable of virtually any reasonable magnification leve, and products teasing with that metric are strong indicators the device inside is a toy rather than a serious instrument.
High magnification, 300x and up, requires a fairly large telescope aperture. This is because useful magnification is directly proportional it. The aperture, in a rather crude analogy, is a bucket for grabbing light from the sky. This bucket can only grab a finite amount of light at any given time, and so its size directly determines how much there is to work with and magnify.
As a rule of thumb, the highest useful magnification of a telescope is about 50 times the aperture in inches. Any higher and you’ll be stretching the available light way too thin. So, for a 4” aperture that’s about 200x, and a 6” 300x and so on. Outside of local neighbors like the moon & planets, Higher magnification isn’t even useful and makes accuratly tracking objects across the continually moving sky tricky business. Dense star fields of the Milky Way disc, star and galaxy clusters, and fainter deep-space objects like nebulae are actually best viewed with very low magnification. Even things like planets and the moon look best at medium magnification, maybe around 150-250x or so. In the time I’ve been into this hobby seriously, I’ve never considered magnification more than a handful of times, and you probably won’t either.
Focal Length & Focal Ratio
Rather than magnification, instead pay attention to the telescope’s focal ratio. This statistic more accurately describes what you’ll end up with at the eyepiece. However, before we get into focal ratio specifically let’s cover focal length, as that’s part of the equation.
A telescope’s focal length is the distance of its objective lens or mirror to the point at which light comes into focus downstream. Some telescope types, like refactors, are simple tubes with a glass lens to bend the light, while other more elaborate designs use mirrors to bounce it back and forth.
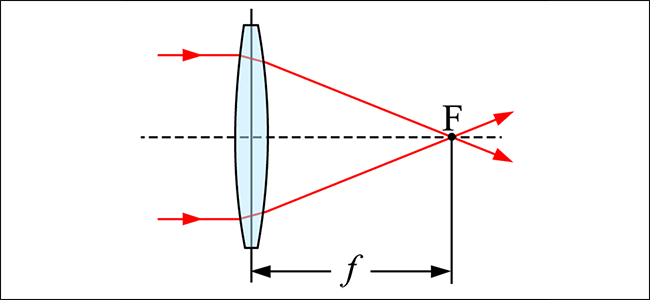
But why does this matter? Here’s an analogy. If an observer looking is looking at scene through a hole in a fence, the farther away the observer is, the smaller the sight picture becomes. However if that observer moves closer, the sight picture increases. This distance between the eye of the observer and the hole is focal length. In both situations the same amount of light is making its way through the hole in the fence, but it’s the perspective which determines how much of the scene is visible, and for astronomers wanting as much useful light as possible—what is there to magnify.
Now let’s add aperture size to the equation. A telescope with an aperture 203 millimeters in diameter and a 800 millimeter focal length is said to have a focal ratio of 3.8. A telescope with a 9” aperture and 2500mm focal length around f/11. Focal Ratio is merely the product of Focal Length divided by the aperture size.
For viewing things like planets and small details like double stars, a larger or “slower” focal ratio is best, perhaps something around f/10 or higher. For broad vistas of the night sky and better views of faint deep-space objects like galaxies and nebulas, a smaller or “faster” ratio will suit you better, down in the f/4 range. Scopes in the middle of these are great “all-purpose” models and perform well for both types of viewing.
One Eyepiece Isn’t Enough
Most entry to mid-grade telescopes come with an eyepiece, but plan room in your budget for at least one more. At minimum I recommend at least two eyepieces: a small mid-power one for planet and moon viewing, and low-power one to pull in deep space objects.
As we discussed earlier the eyepiece is what determines the actual magnification of the sight image coming from the telescope. However the magnification power isn’t fixed to the eyepiece. The same eyepiece in one telescope will give a different power when placed into another. I know it sounds a little confusing but hang with me—it’s easy to understand.
In order to determine the magnification power of an eyepiece in a given telescope, just divide the telescope’s focal length by the eyepiece’s optical size:
1500mm telescope / 9mm eyepiece  = 166x mag

900mm scope focal length / 9mm = 100x mag
This is the reason why using the telescope’s focal length and focal ratio is a better indicator of it’s actual performance than magnification value itself, and why it’s misleading to use magnification as a performance indicator.
Also, here’s another important point about eyepieces. Let’s take that same 1500mm telescope & 9mm eyepiece and compare it to a 35mm eyepiece in the same scope:
1500mm scope focal length / 9mm eyepiece  = 166x mag

1500mm scope focal length / 35mm eyepiece = 42x mag
This seems counter-intuitive up front and causes some confusion for those new to the hobby. But smaller eyepieces actually do have higher magnification potential than larger eyepieces. Use these quick equations along with the useful magnification guideline we covered to ensure an eyepiece will work well with your telescope rig when shopping around.
Finally, the industry has standardized on two eyepiece form factors: 1.25” and 2”. Bigger scopes usually sport focusers that accept 2” eyepieces while smaller ones use the 1.25”. There are adapters allowing scopes with 2” eyepiece focusers to accept 1.25” ones, so if it’s in the budget, choosing a scope with a 2” focuser is the best of both worlds.
It’s a good idea to do research on eyepieces before landing on a telescope, as some of the larger ones can be quite expensive, often as much the telescope itself. I’ve found that many newcomers in the hobby didn’t realize this and end up with a nice telescope only to be limited by poor-quality eyepieces to look through it with. That was the case with my first “real” telescope, a 12″ Orion reflector. Having spent my entire budget on the telescope, I was disappointed to find the included eyepiece was merely mediocre and didn’t deliver what I’d hoped.
These days, good quality eyepieces are usually what I tend to invest into because they really do increase the enjoyment of the hobby. After all, eyepieces are reusable and will will work on any telescope you pick up down the road, so it makes sense to buy into quality and make room in your budget for a few good ones.
Mounts
Mounts fall into two broad categories: Alt/Az, or Altitude/Azimuth and Equatorial. Both styles allow the telescope to pan and tilt around the sky to view objects, but the method in which these two styles accomplish it are much different.
Alt/AZ’s come in a few different styles, but the most common being the lazy susan type. These mounts are most often used by Dobsonian-style telescopes, and are great for beginners. These are larger rotating platforms that sit flat on the ground and rotate. There are also Alt/Az fork-mounts on a tripod, more portability but fundamentally they work the same way. On an Alt/Az the telescope will whirl around on an aziumuth axis parallel to the horizon, and also have an altitude axis so the scope can pitch up and down in the sky. These mounts are great for beginners because they easy to set up, and are usually quite durable. They also tend to be less expensive than their equatorial counterparts.
Equatorial mounts are more complicated. Like Alt/Az mounts, they move in two separate axises, but in a different orientation. One axis is pointed at the celestial pole, called the “Right Ascension” axis. Imagine a straight line coming out of the earth’s north & south poles. The imaginary spot at which the line points in the sky is the celestial pole. When looking at this point, the entire night sky will appear to rotate around it. The Right Ascension axis on an equatorial mount attempts to follow this path as well.
The second axis on an equatorial mount is called “Declination”. This axis allows the telescope to radiate to and from, or in and out from the Celestial Point in the sky. By combining these two movements any object in the sky can be tracked.
Before using an equatorial mount, a process called polar alignment is required. This attempts to align the mount’s Right Ascension axis as closely as possible to the polar rotation point in the sky. You’ll need to set your latitude as closely as possible on the mount, ensure it’s reasonably level, and then align it with the star Polaris. Most equatorial mounts come with something called a polar scope built right into the mount’s chassis to assist in the process, but some do not. Initially this can take quite a while to do well, though with practice you’ll get better over time. Also, if you have some partially cloudy skies that are obscuring Polaris, aligning your mount will have to wait.

An Alt/Az mount allows you to just setup and go, so why would anyone choose an equatorial mount over an Alt/Az? Because equatorial mounts, if aligned well, only need to move in one axis to track the sky, the right ascension. For astrophotography and scientific purposes, these are vastly superior as it’s much easier to keep a steady view when the telescope’s movement is closely matching the sky’s movement. Alt/Az mounts, while simpler, don’t move in the same direction as the sky, and instead need to combine directions at once in order to smoothly track—neither of which are matching the path of the object directly. While this zig-zag style movement is completely acceptable for naked eye viewing, it isn’t smooth enough for multi-minute exposures or detailed measurements.
Which mount is right for you? If you have any interest at all in astrophotography, pick up an equatorial mount out of the gate. While it is more difficult to set up initially, with practice, you’ll be able to do so in a matter of a few minutes in the evening.
In Closing
If you’ve made it this far, I think you’ll go far in the hobby. Astronomy is a lifelong adventure of making mistakes, learning from them, growing as a an amateur scientist, and most importantly–patience! Don’t be frustrated by the hurdles. Challenges and solving them are part of the enjoyment. Please, do not hesitate to comment or reach out via my contact page if you’d like future articles on any topics in particular!

I wish you good luck and clear skies…